
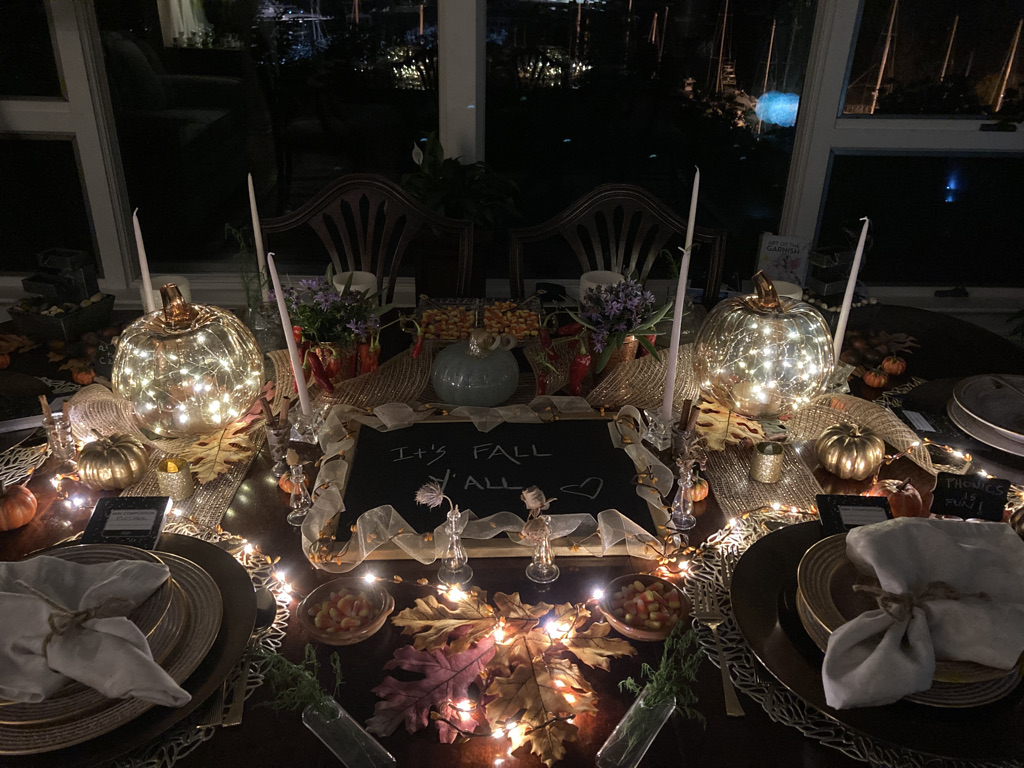
For me, Halloween is all about celebrating the spooky season but with a bit more of a glamorous tablescape and hallway greeting than the usual gourds and orange pumpkins.
I was looking to tell a twinkling, autumnal interpretation of a happy trick or treat holiday.
I wanted it to be more about the art of tablescaping for this most favorite holiday.
(Did you know that, in fact, Halloween is now only second to Christmas in terms of popularity?)
Given that Halloween has, at its core, dressing up in costumes, it only seems apropos to “dress up the table and noteworthy home spaces with some inspired, seasonal masquerade.
Especially when the harvest season screams out for luncheon, dinner, and cocktail parties to celebrate the abundance we enjoy and share this time of year.
So let’s delight in dressing up.
I began my Halloween tablescape and home decor compositions as I always do -- by dreaming a bit. This post is a vignette reflection from two years’ ~ using and repurposing many of the elements but in new, and creative ways.
You can create a whole new look that suits your mood and frame of mind by answering the question: “What story do I want to tell?”
Tablescapes, of course, are more than mere centerpieces.
The overall tablescape look comprises the entire table, amplifying an event or holiday or your guests -- with your personal style, color, and dimension.
It tells your story; your fantasy… While making your guests feel welcome and relaxed.
The visual stimulation of a compelling composition sparks fun and conversation.
Good tablescapes create a sense of balance, harmony and personal style.
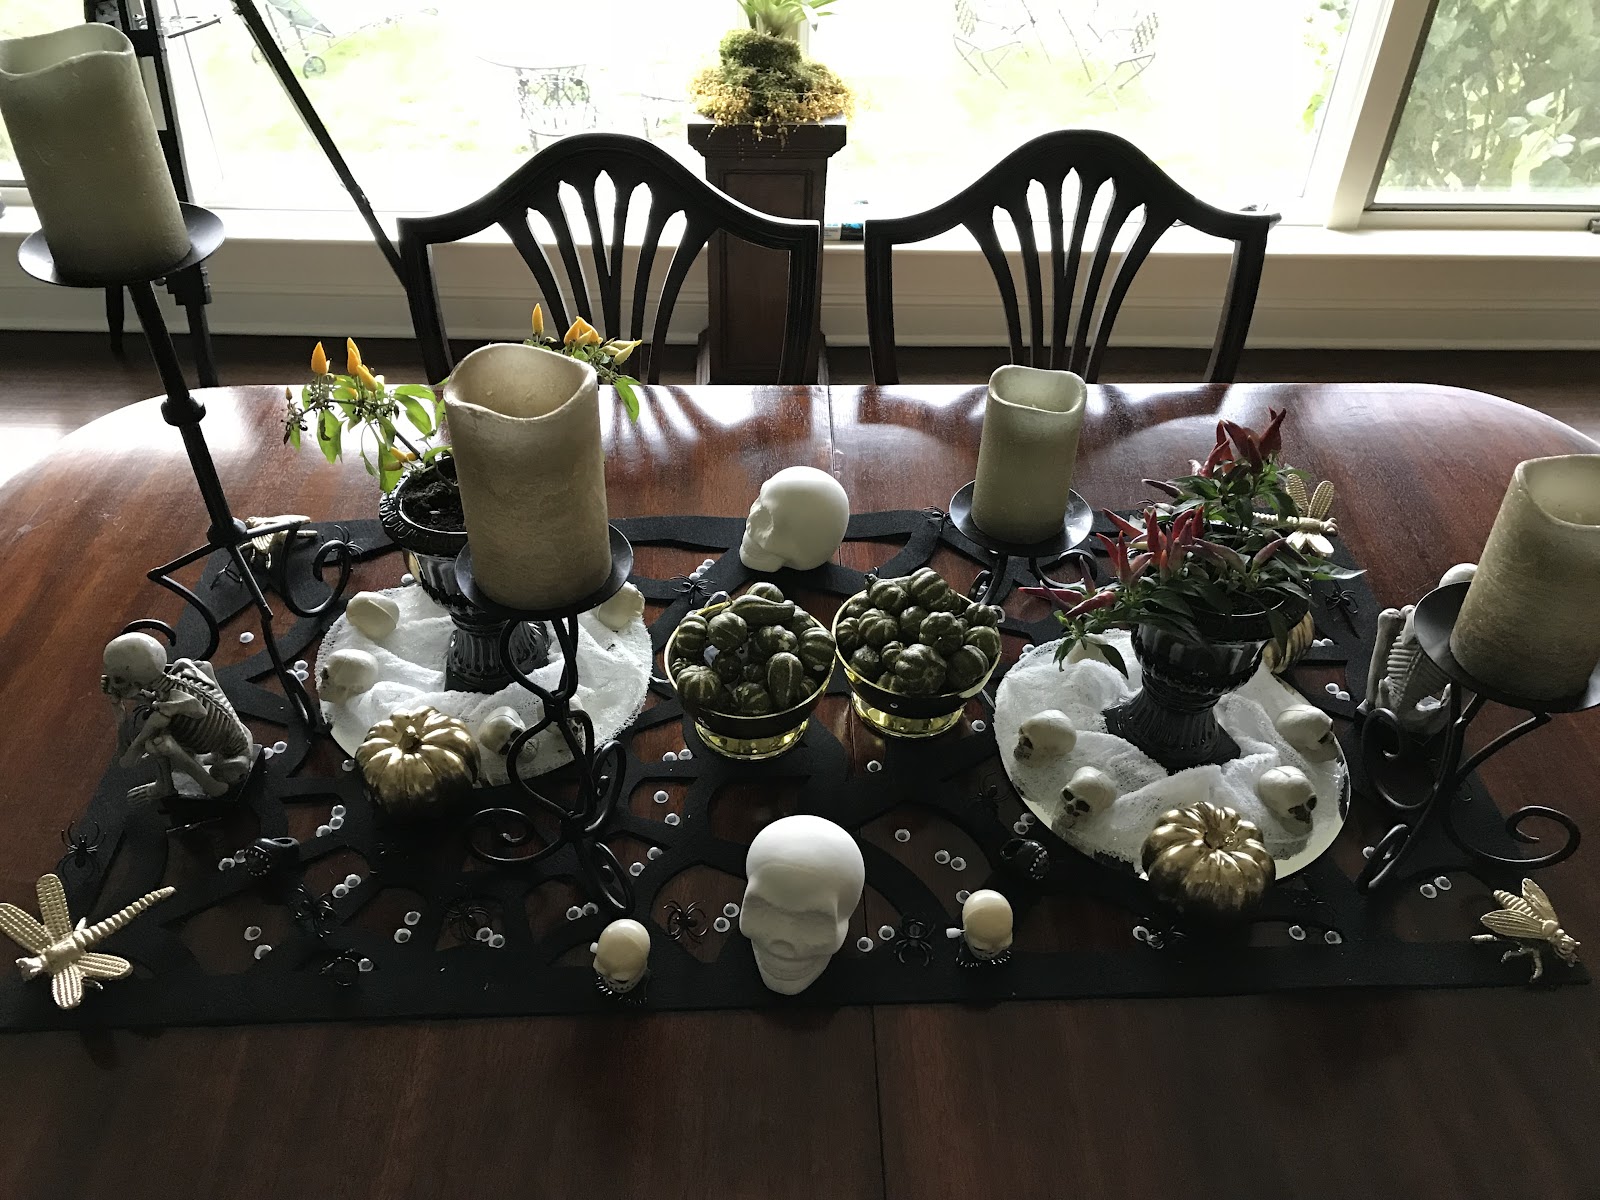
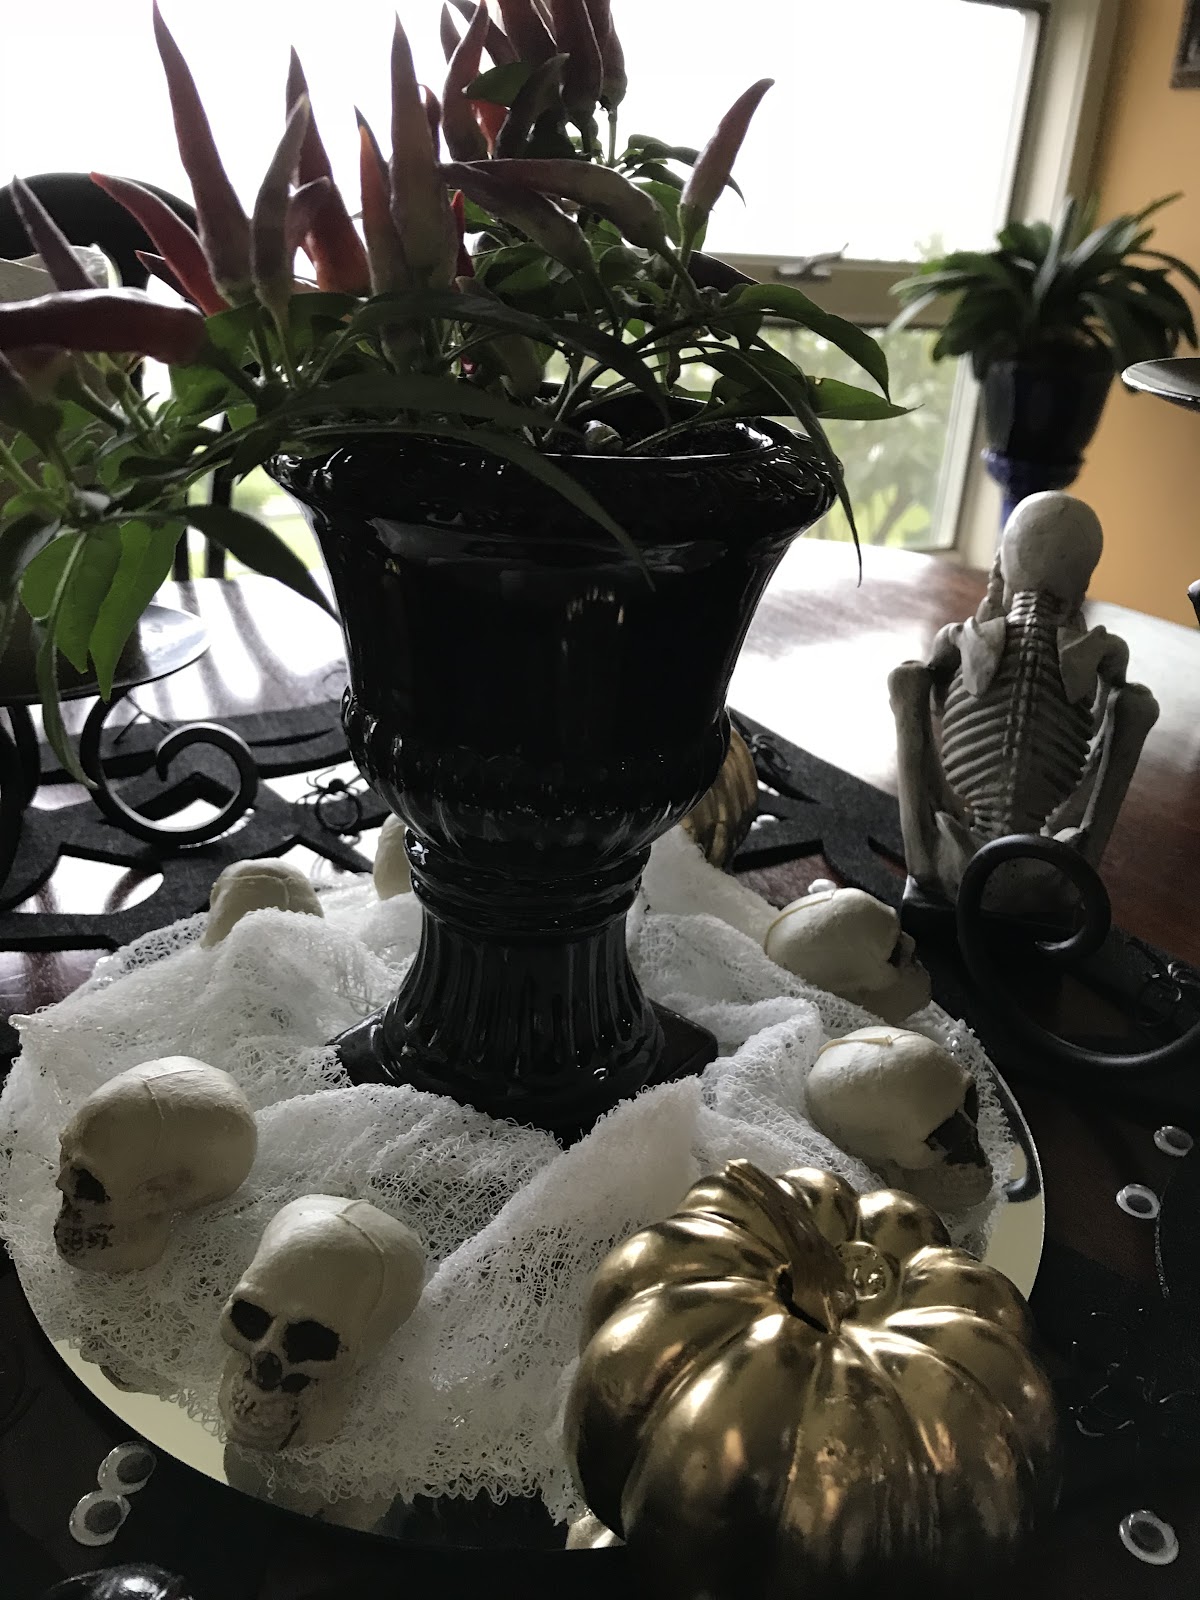
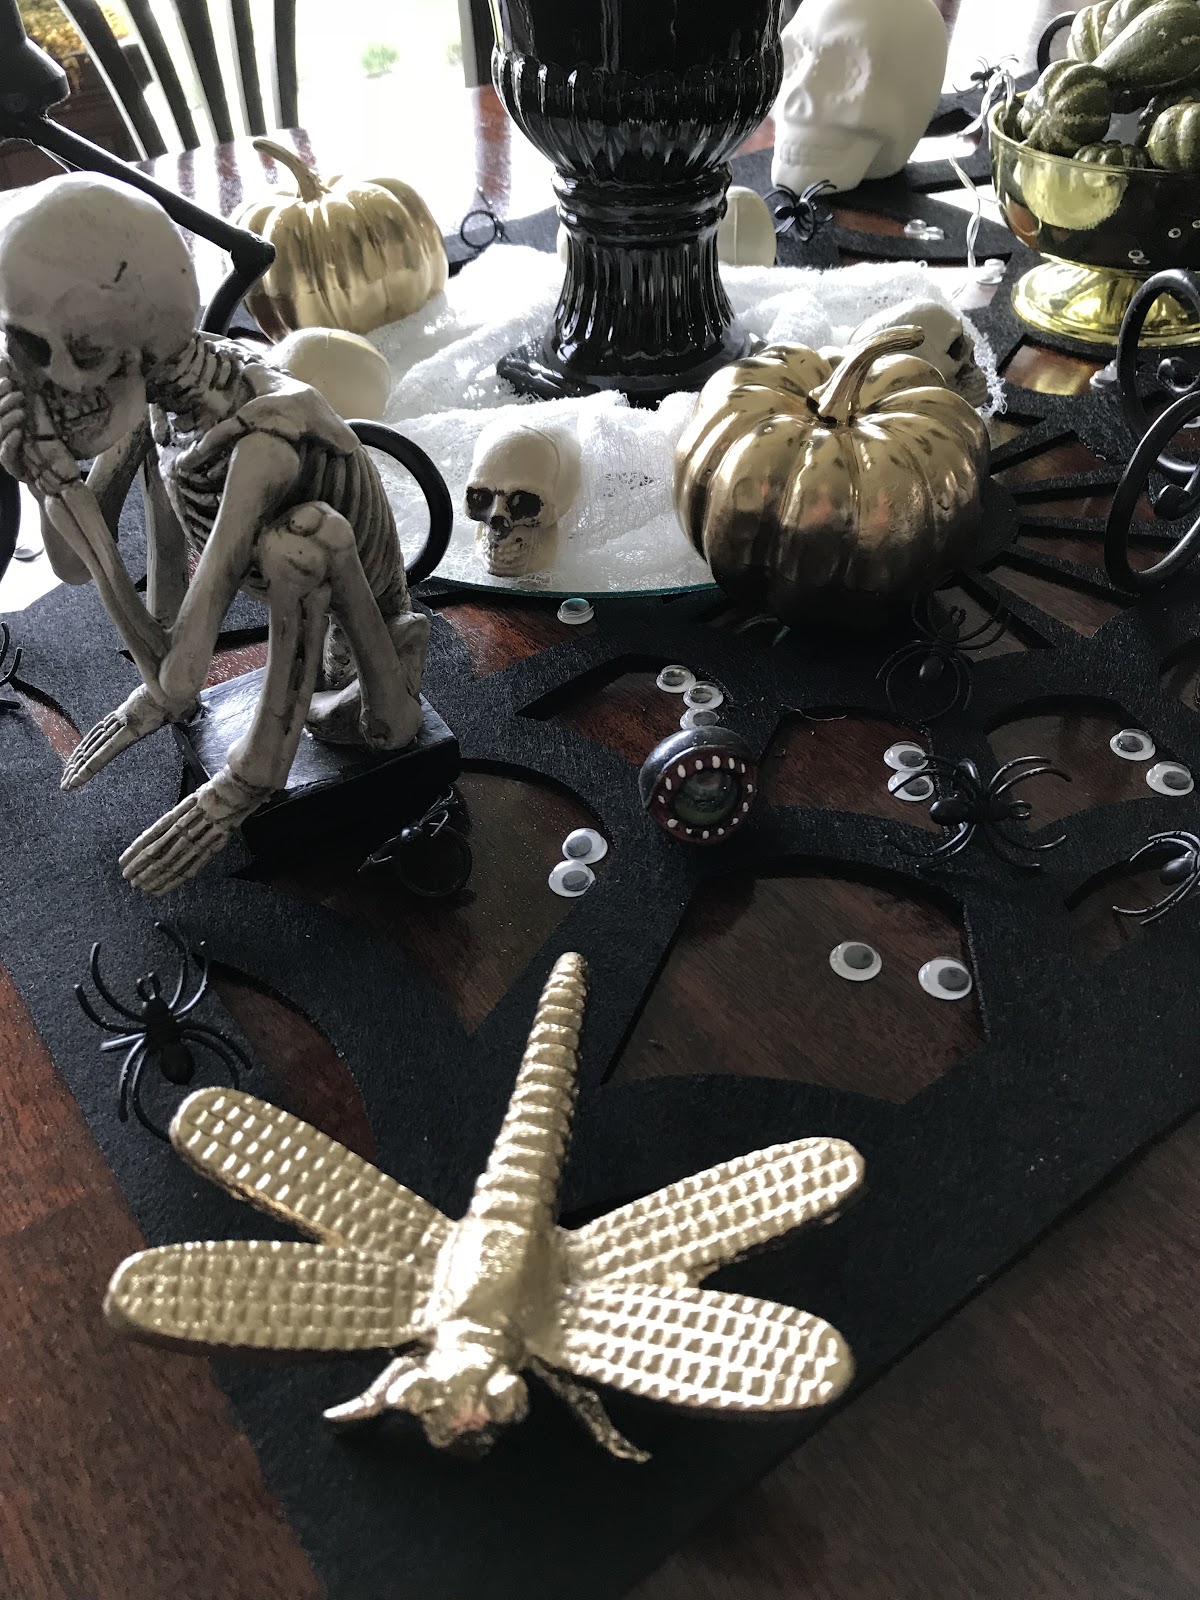
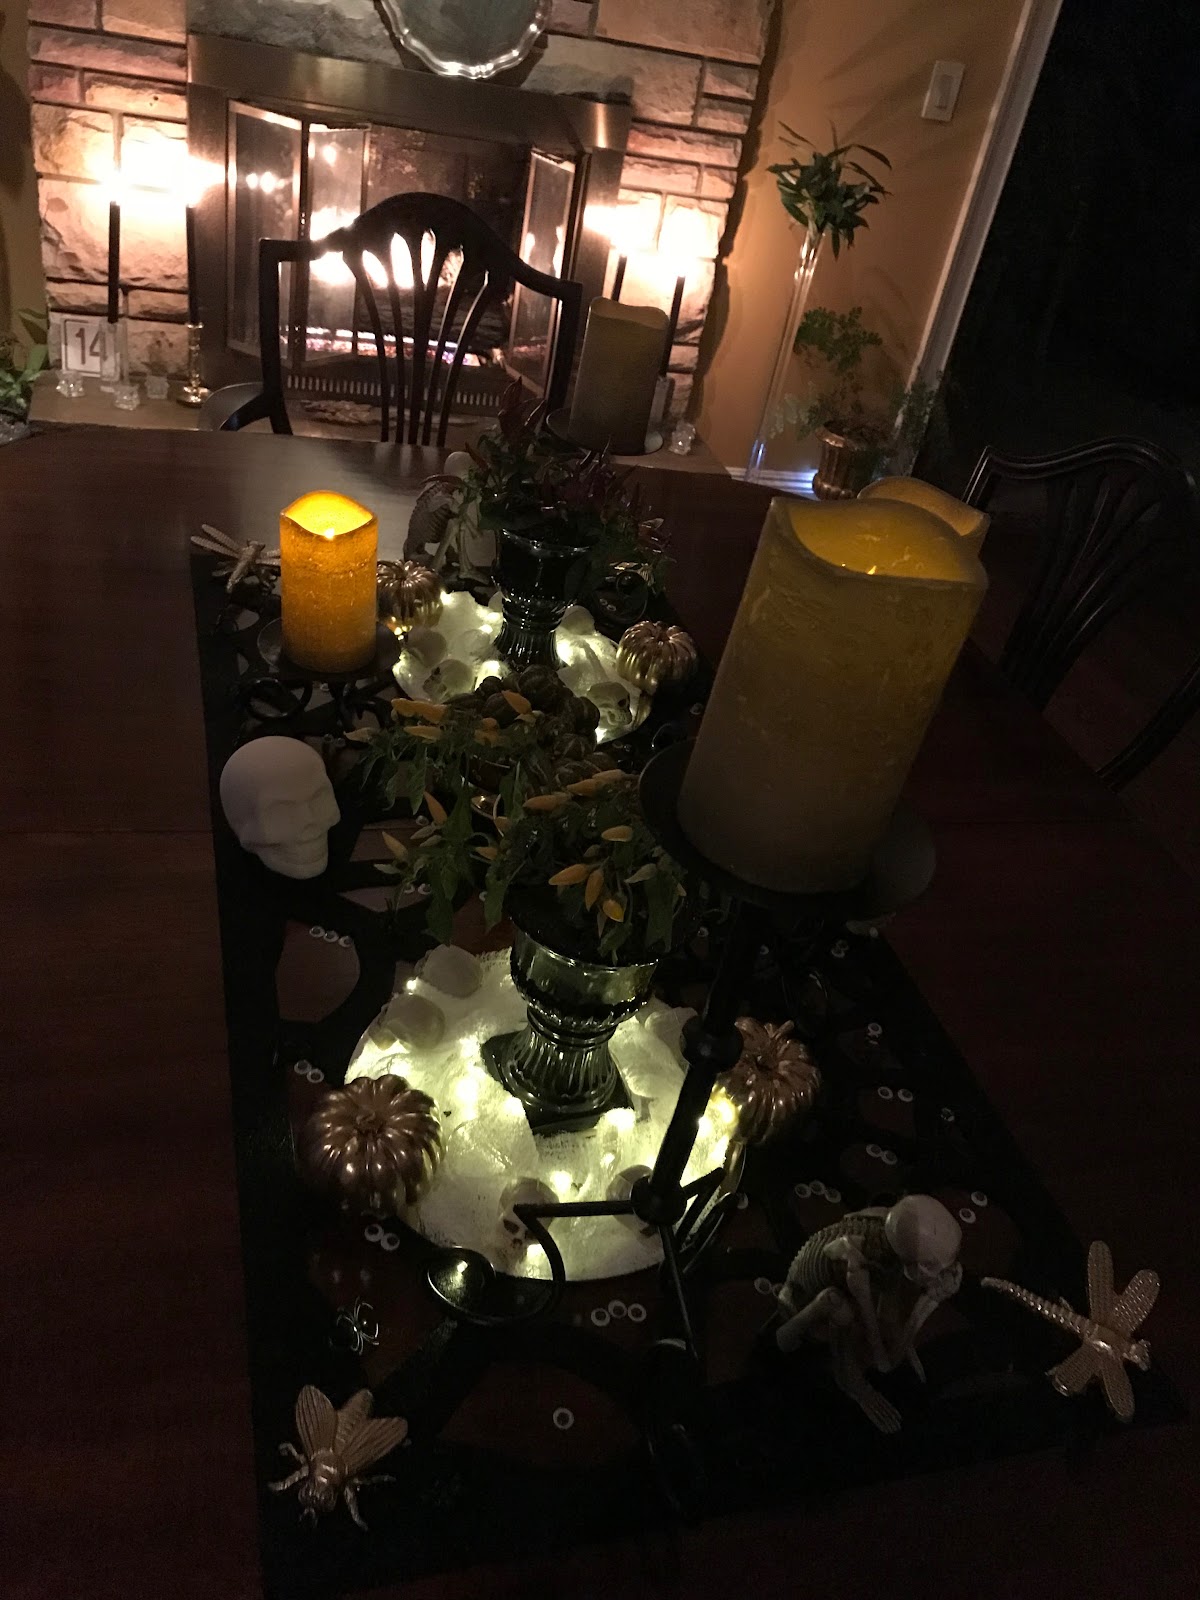
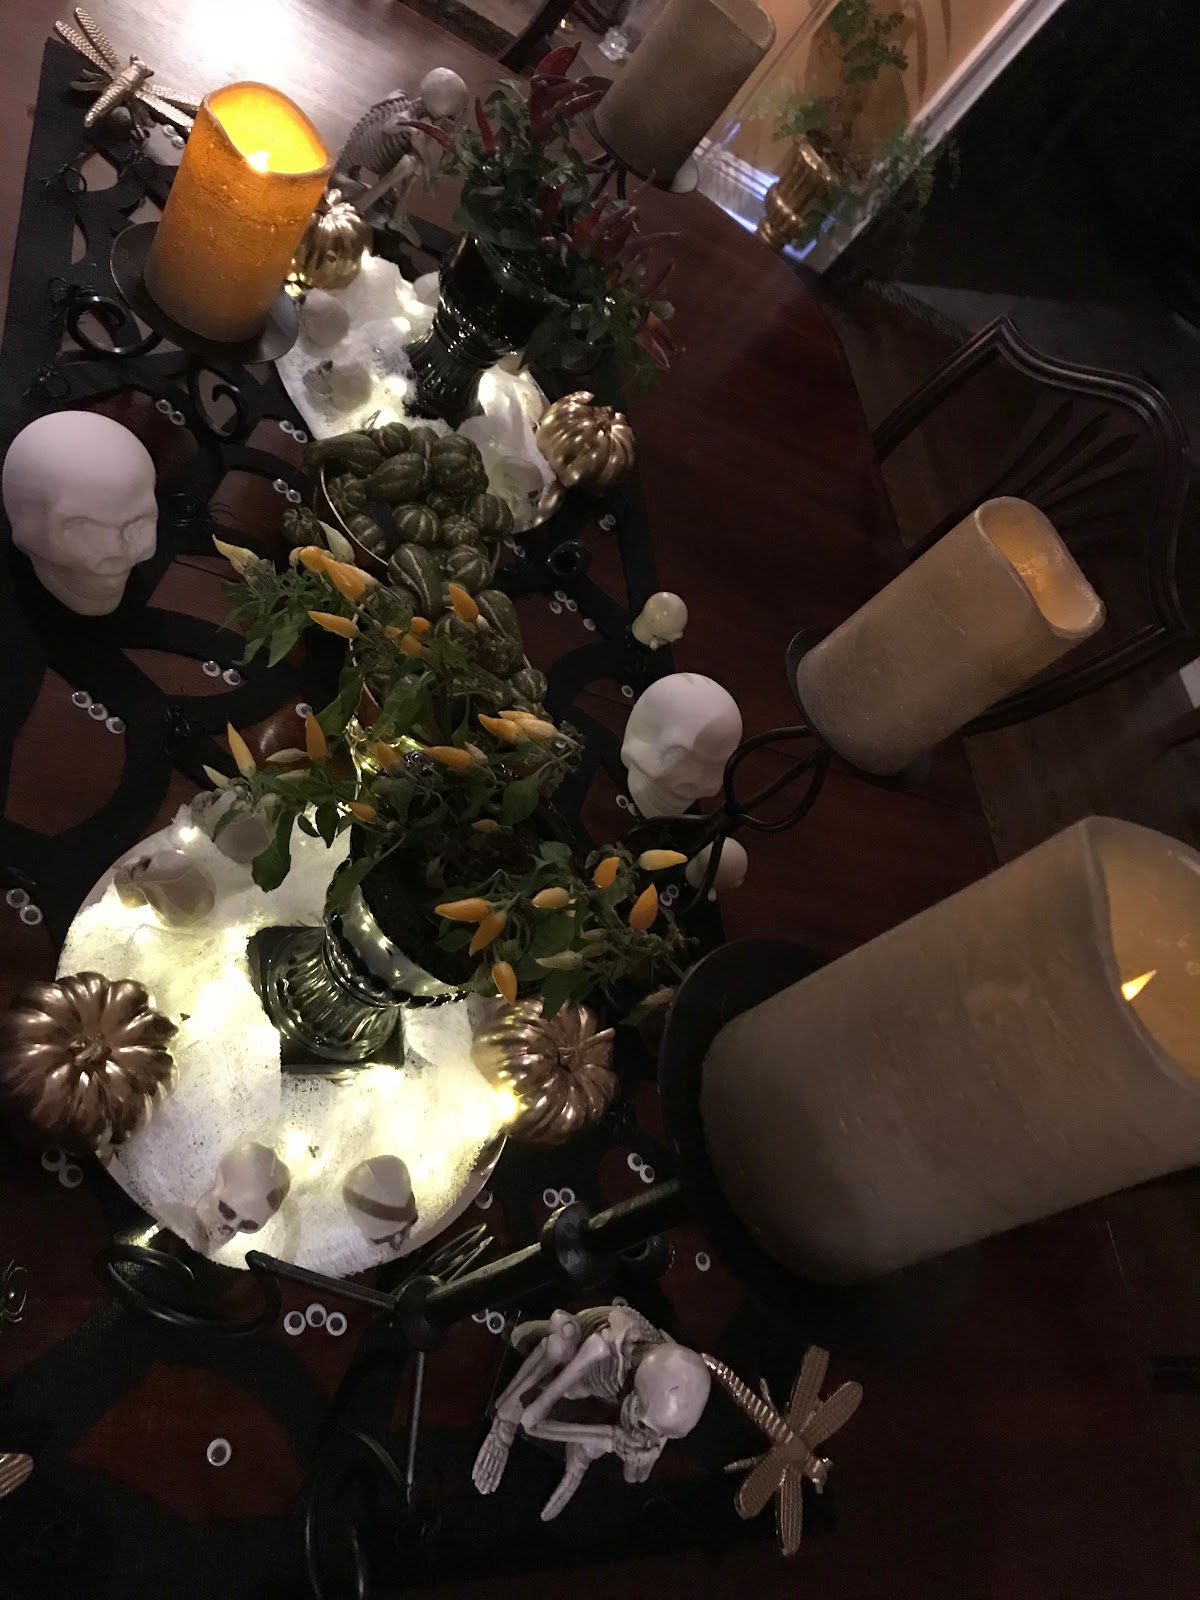
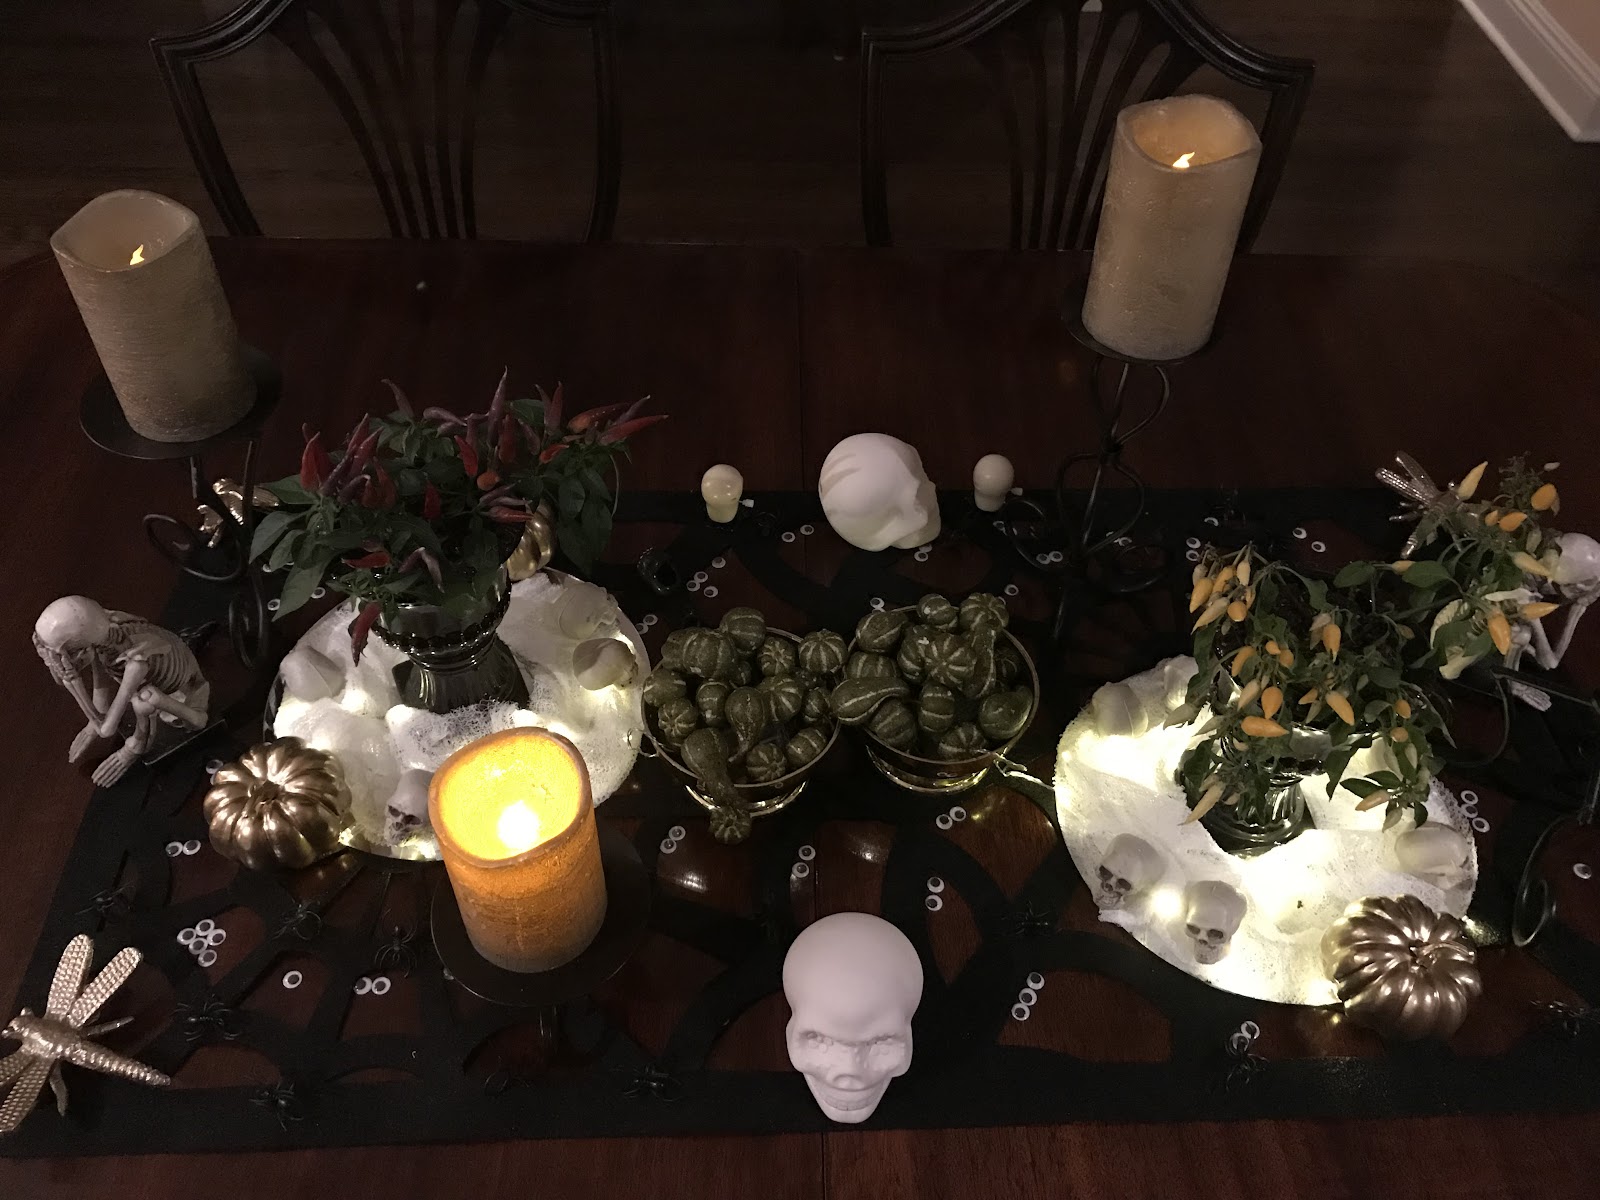
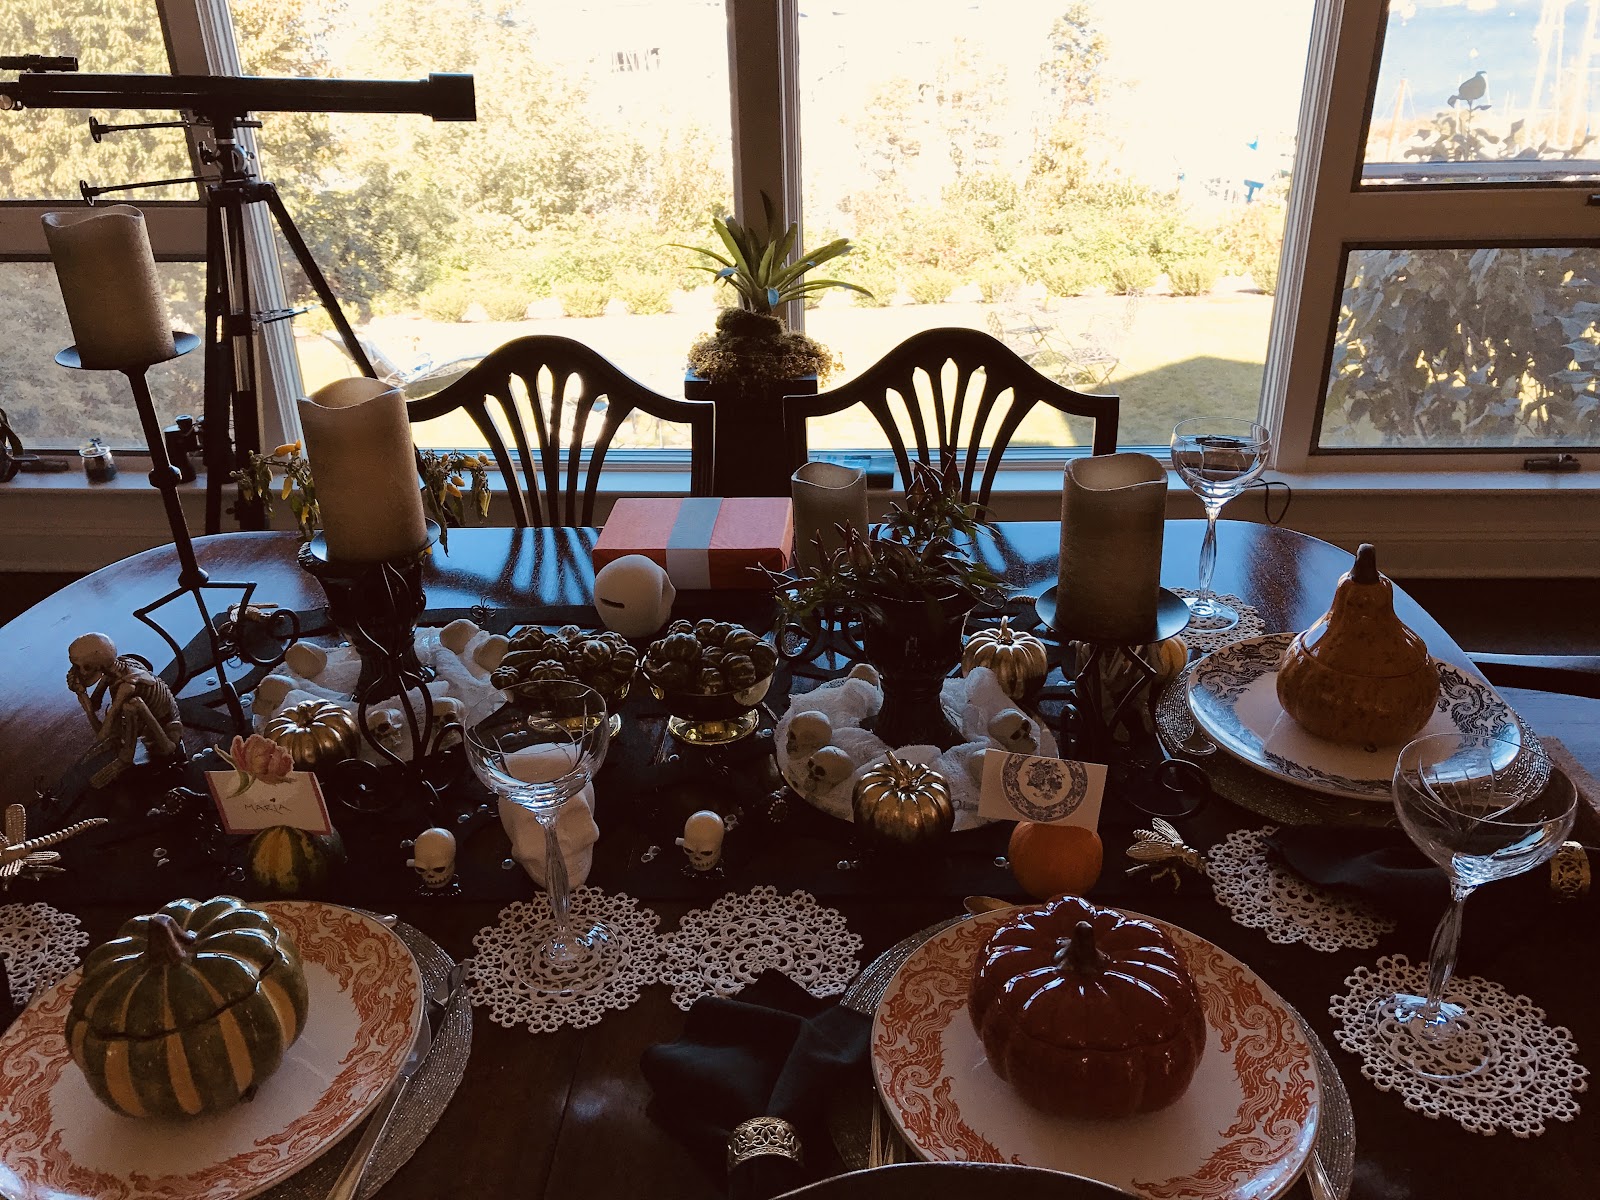
For this tablescape design from year’s past, I was drawn to artful skeletons - more as sculptural objects.
I went for the skulls, especially... Skulls and skeletons can be pensive (Rodin?!) or rather sweet - even humorous.
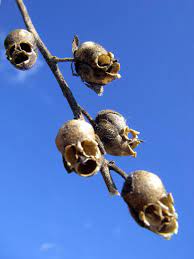
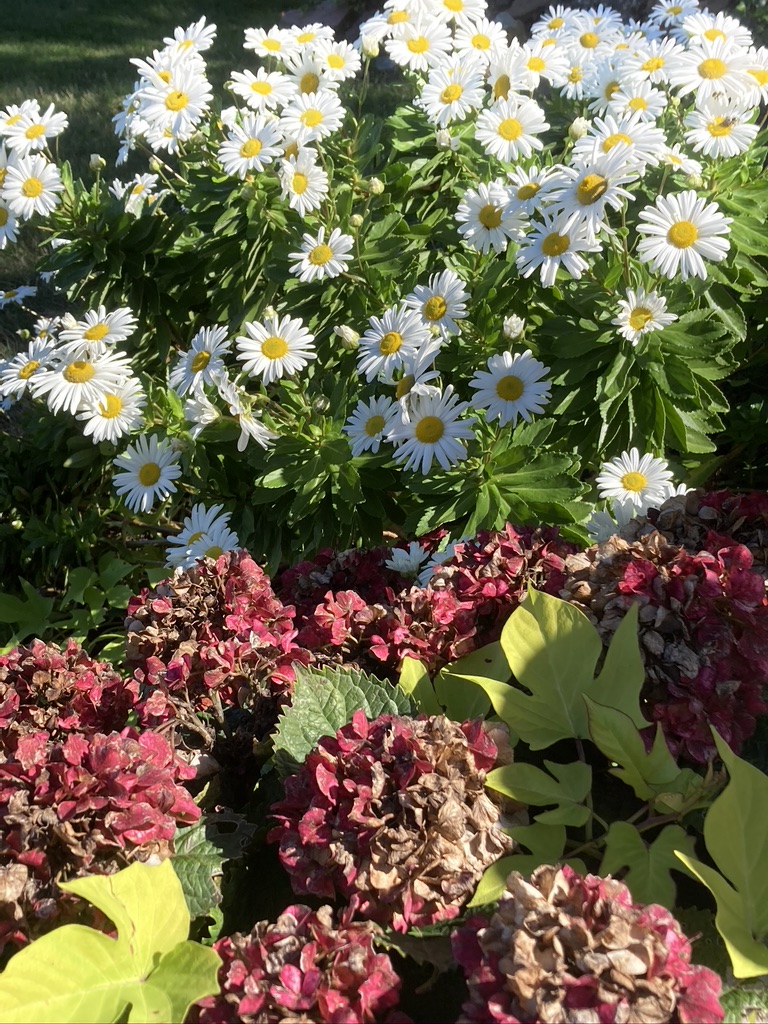
Don’t get scared if you think you see skulls in your garden!
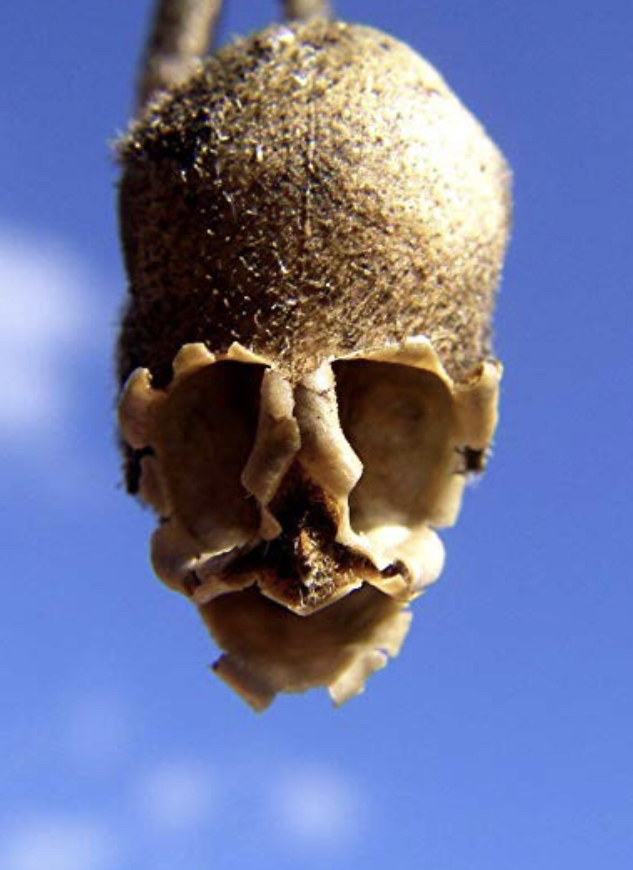
There are some creepy garden plants, such as the dried, flower seed pod of the Snapdragon: Antirrhinum majus.
In the olden days, people thought the plant possessed mystical powers and would place them around their homes to shield the house from curses and witches.
In Victorian days, the flower was a symbol of deception, suspicion, and mystery.
Plants are magical! You can cut the snapdragon seed pods and use them to a cool, spooky effect!
(Photo courtesy: reekoscience)
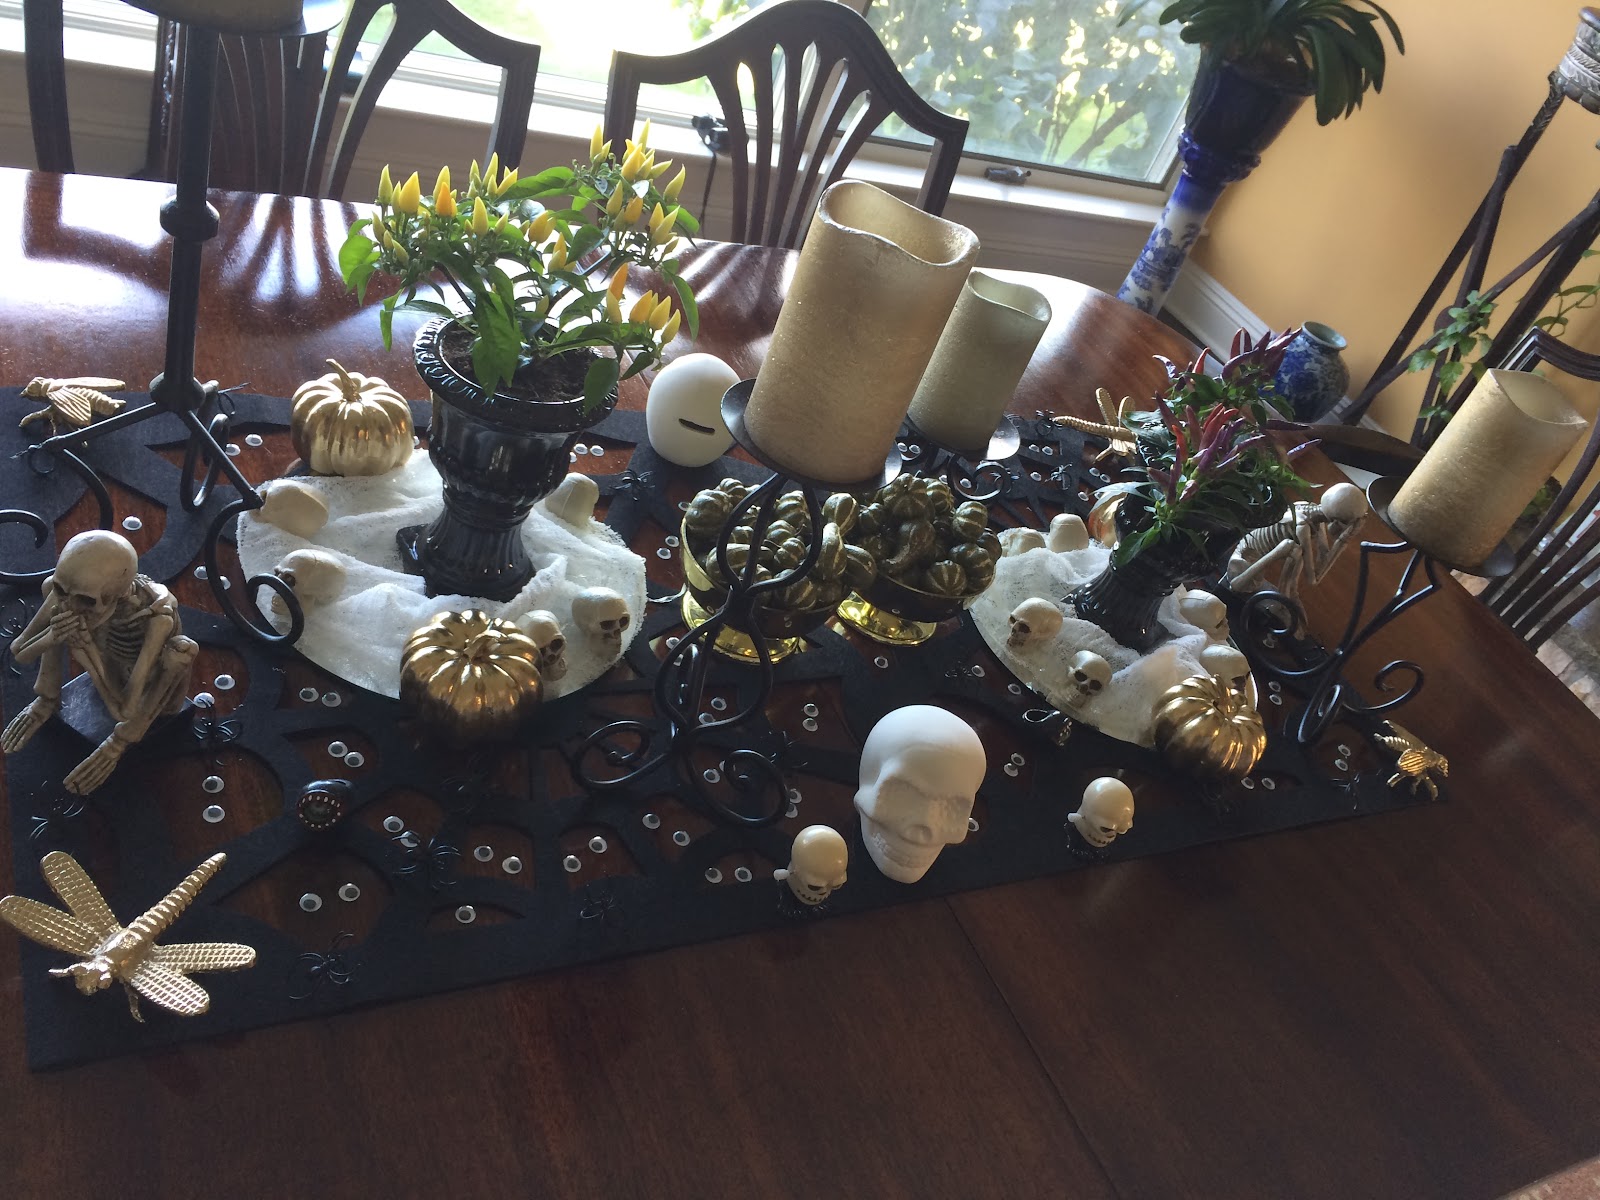
In terms of the tablescape color, witchy black was the spooky shoe-in, right? Dark, mysterious - and sophisticated. Plus, as a New Yorker, we think black is perfect for every occasion! Ha.
To harmonize, I thought the color gold, with gold accent pieces would add that touch of elegance.

I use the tiny white (battery-operated) string lights for most every tablescape. The evening twinkle is frothy and romantic - and can stand up to our Gotham cityscape view that sparkles out on just the other side of the bay - seemingly within reach.
And I always create a trompe l’oeil or a kind of “vehicle” that allows me to hide the battery pack for the two light strands. After all, we’re creating an illusion…
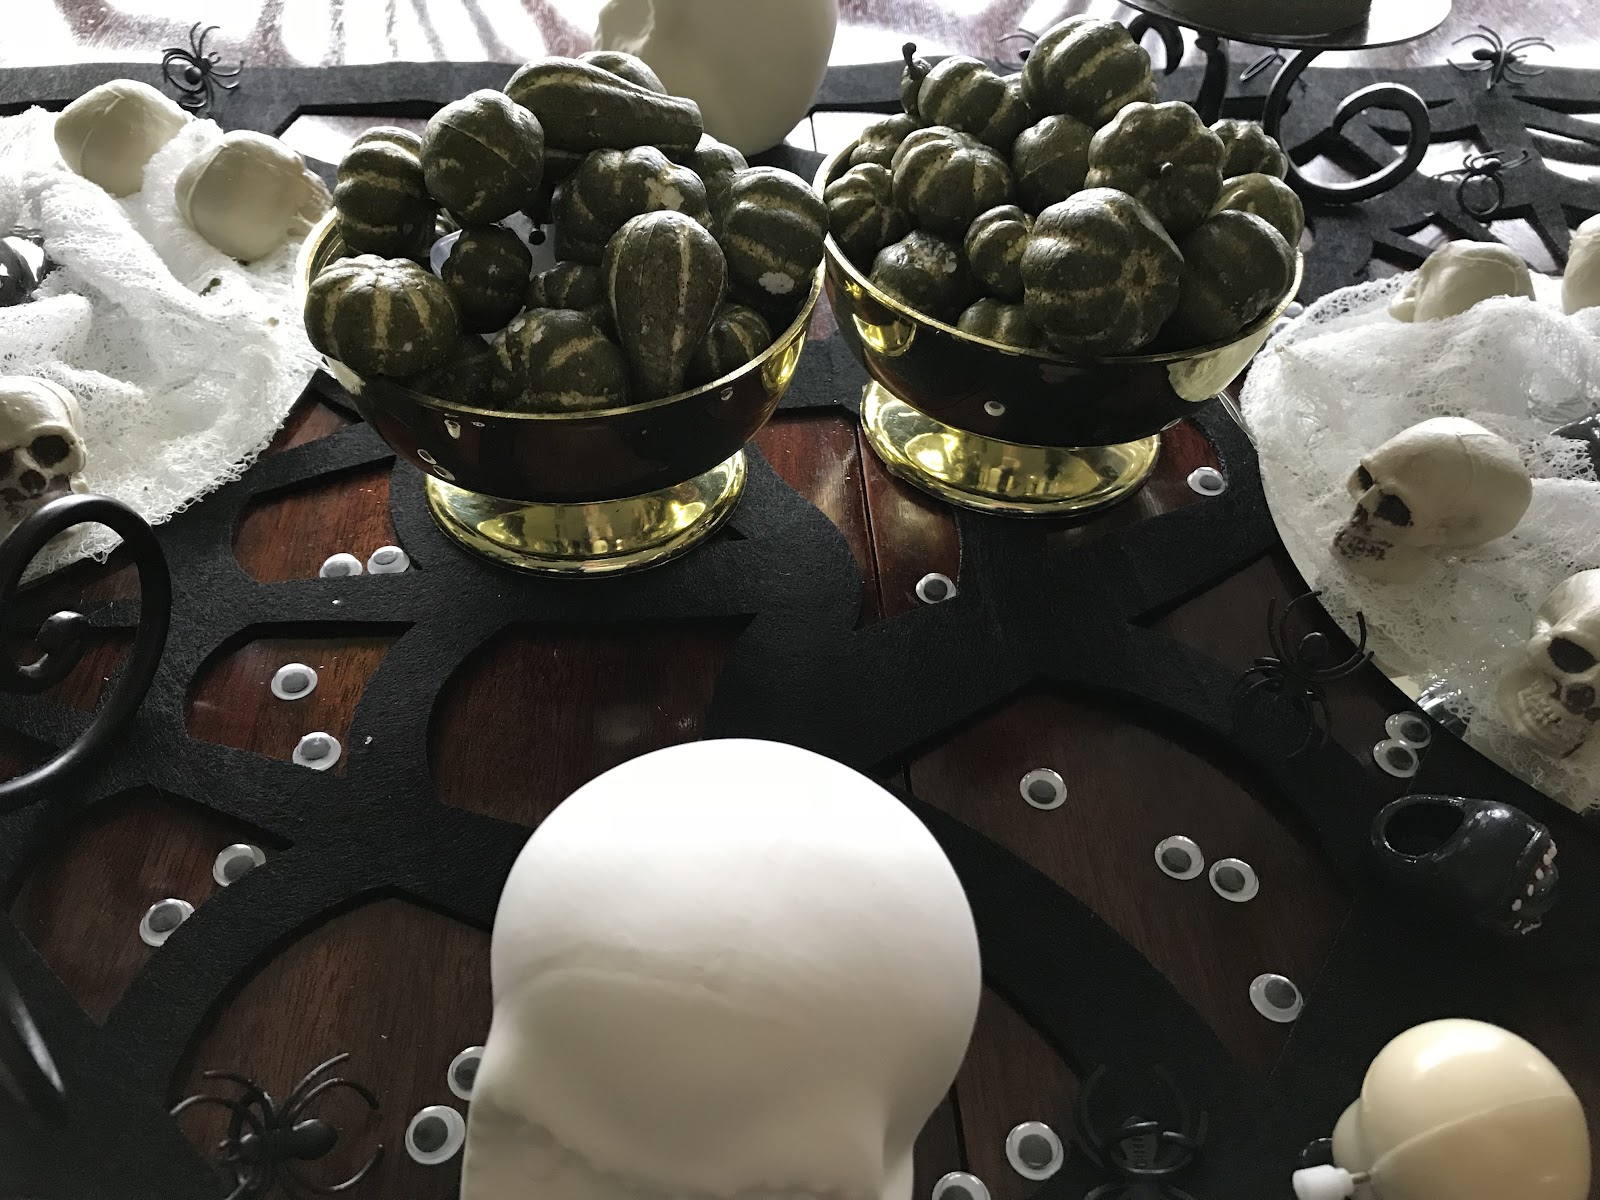
Keeping with the gold color and elements theme, I repurposed two small gold urns and topped the batteries with store-bought mini green and gold gourds.
Overall, I think it’s always best to lay out the design elements and look at them on the table; then determine what you have in your own decor inventory or household items that could work in the design.
You’ll be surprised how many items can be repurposed.
Next up is to make a list of design elements you saw when you were in the dreaming stage of telling your tablescape story. This keeps you focused when you get to the store and maybe become overwhelmed or distracted by displays there.
My initial ‘search and shop’ was in a local store where I got those spiky succulents.
I also found perfect small black lacquer pedestal urns - (they looked as if the front porch’s big urns had hatched teeny offspring!)
The shiny, black urns were perfect: size and price-wise so I got four - two for the table and two for the entranceway.
I also found spiky air plants to accessorize the urns and succulents.
I got small chile plants -- one with yellow pepper plants and the other with purple pepper plants.
I was beginning to build the composition.
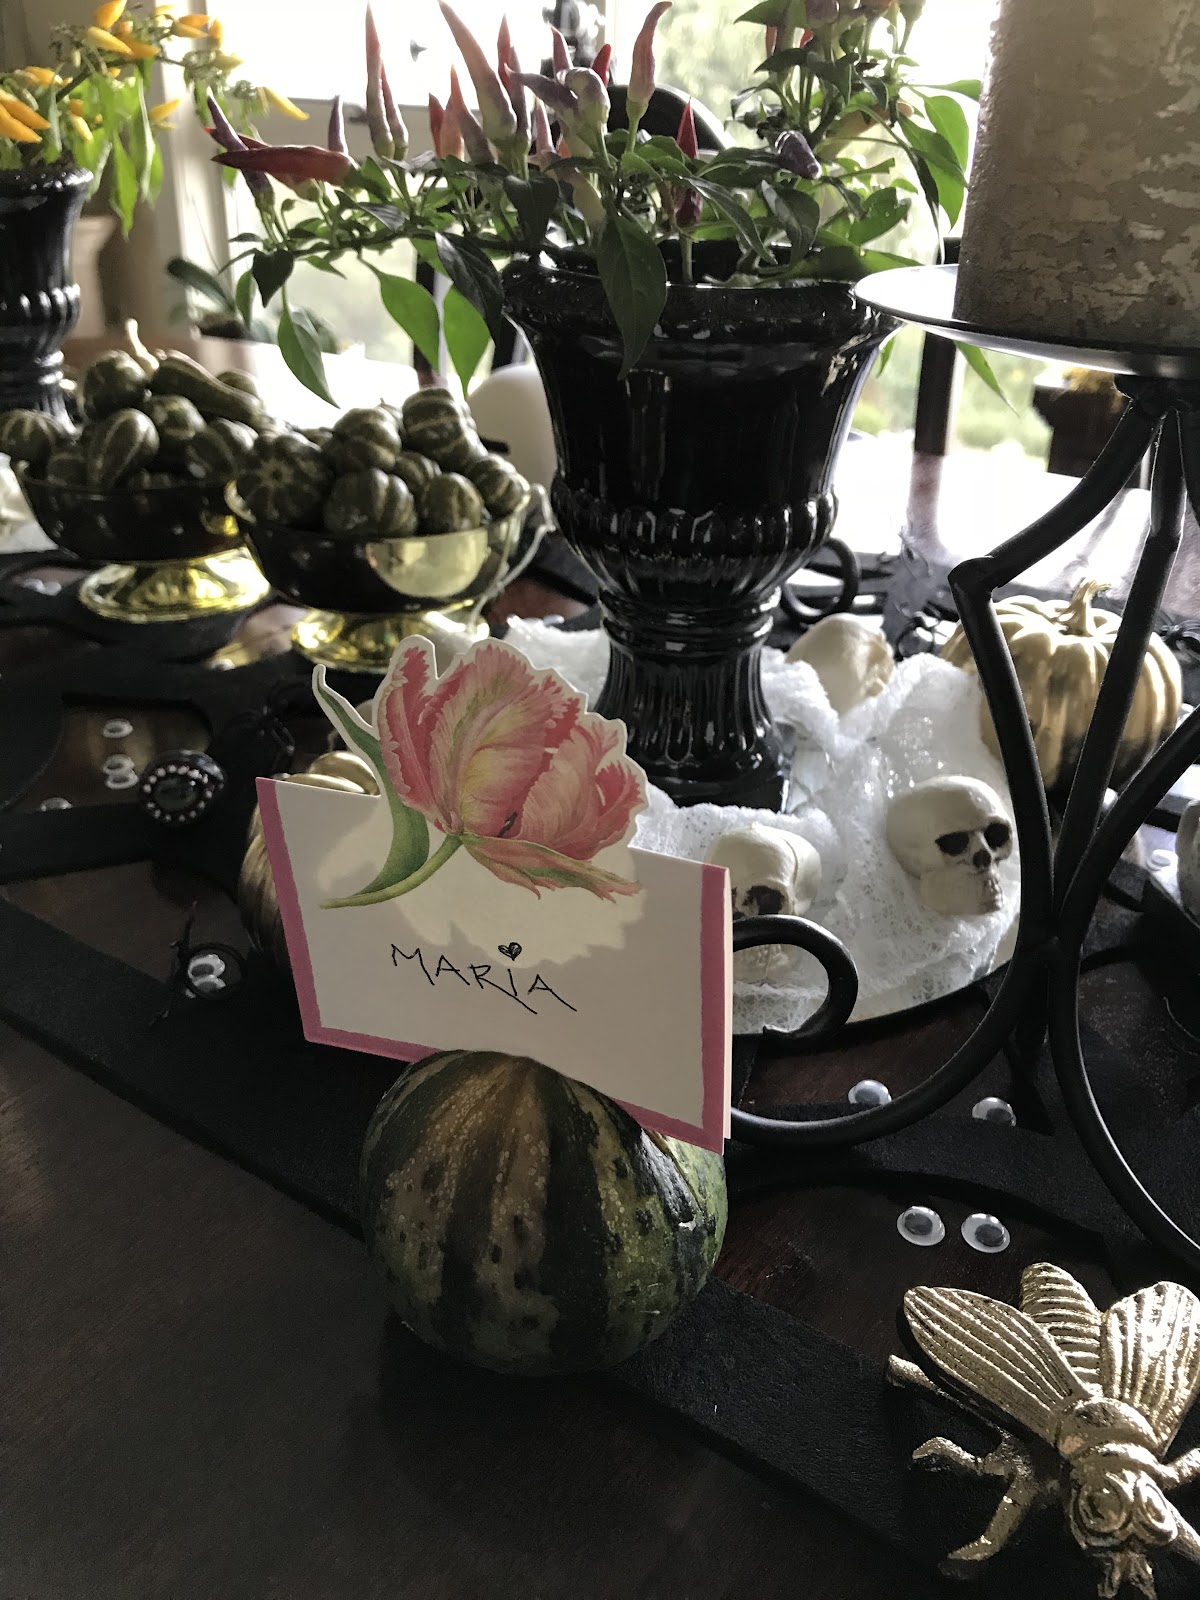
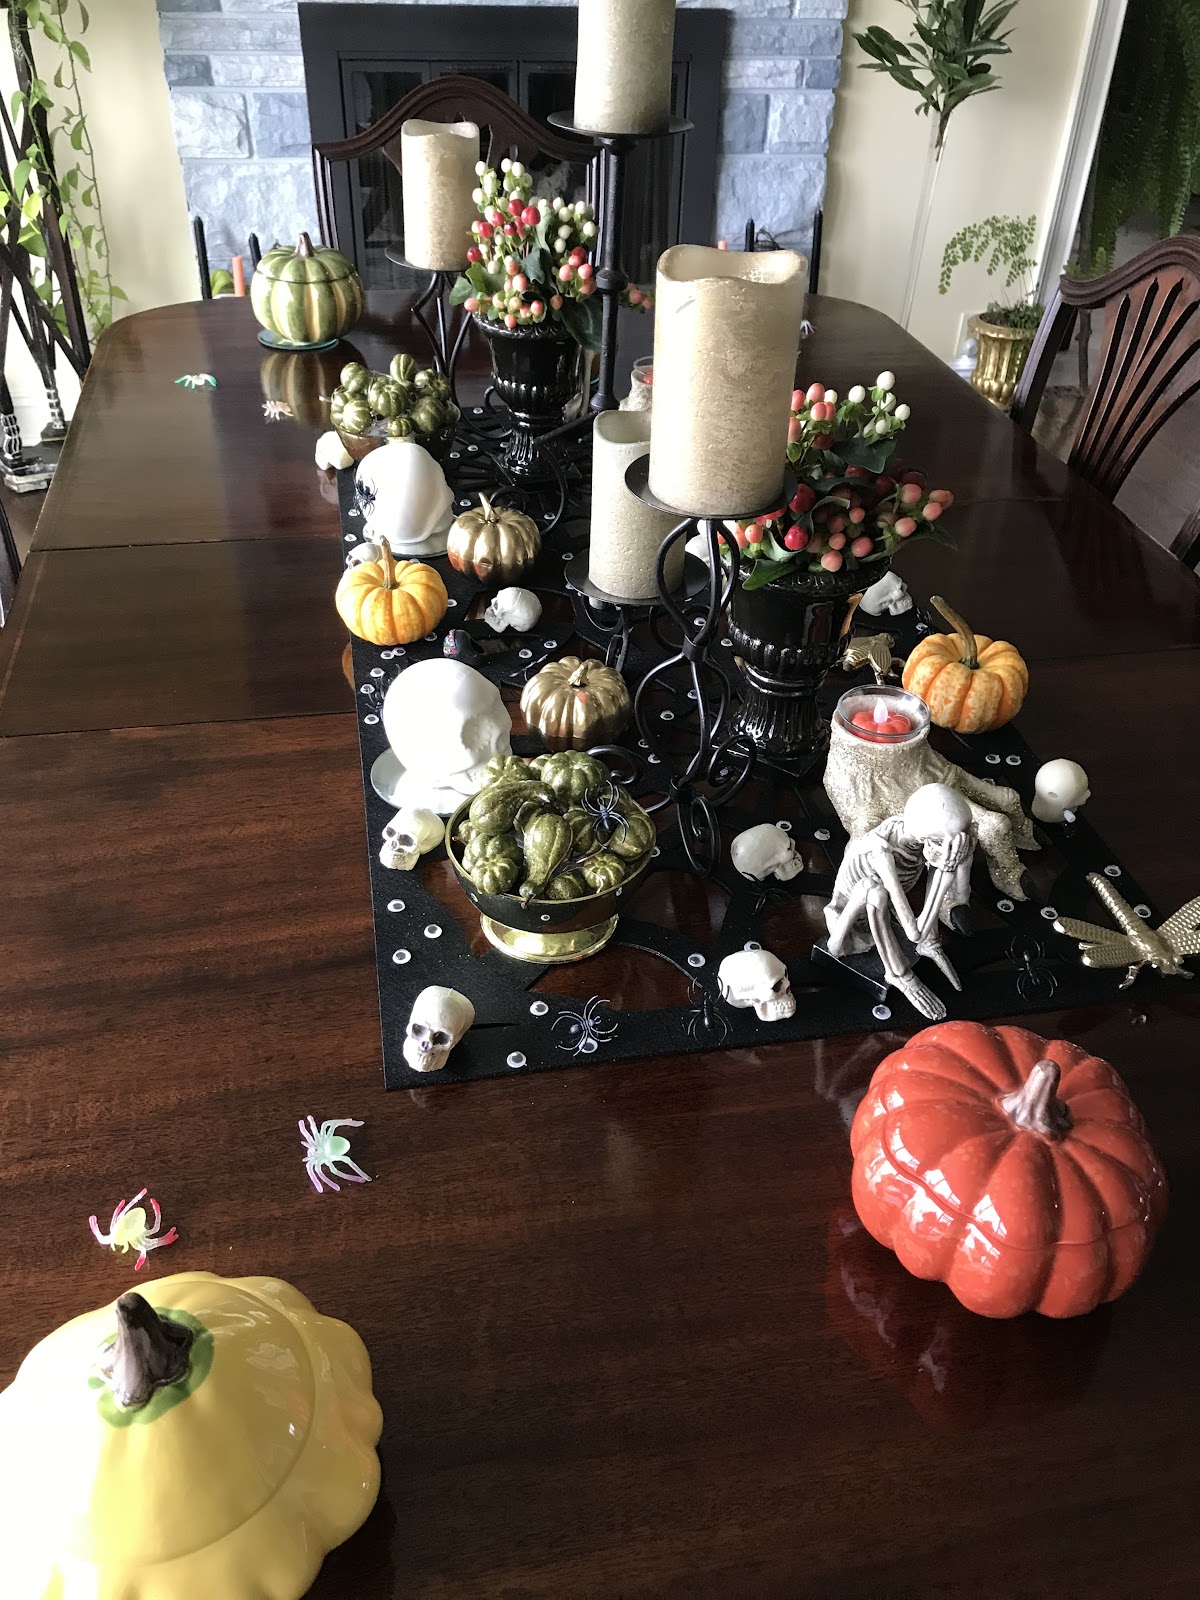
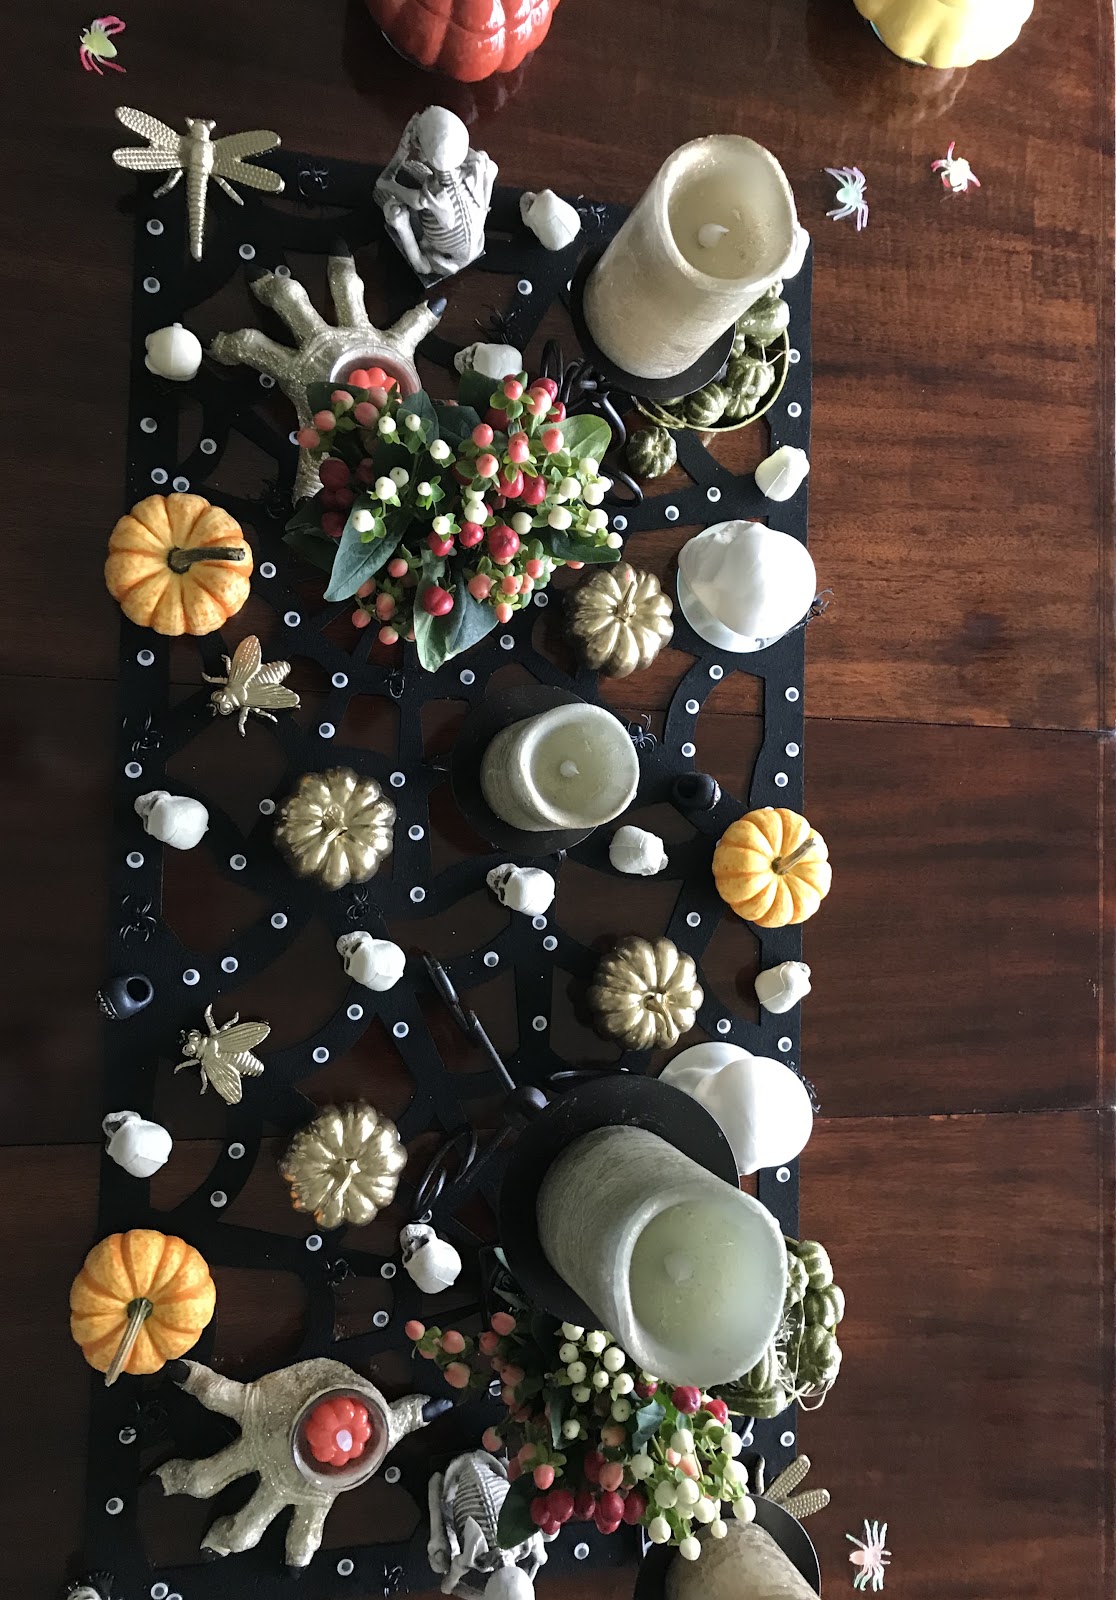
I bought a black, felt “spiderweb” table runner.
I got packs of “eyes” to place inside the web. This was a whimsical element that was so much fun when dining. All those googly, “peepers” looking back at you!
I also got eye rings -- where the eyeballs actually roll a bit - and placed them on the runner, too. Fun - as a kind of kooky cocktail ring! And the skull (banks) worked well with the other elements.
The point here is not to limit your design to items that are expressly made as decor - but to think of elements that can add charm and style - whatever their original utility might have been.
I placed the plants in two of the black urns. Then, I placed the urns on the round mirrors. The mirrors amplify the main element’s value in the composition.
I wanted gauze to add that spidery look and to help cover the lights’ “wires” but when the party store didn’t have the gauze - I just went to the pharmacy and bought a roll of gauze (for a lot less money) and wrapped that around the urn and over the lights.
Then I placed teeny, tiny skulls around the mirror, on top of the gauze.
You don’t see the wires and at night when it’s lit -- the illusion is dramatic and elegant.
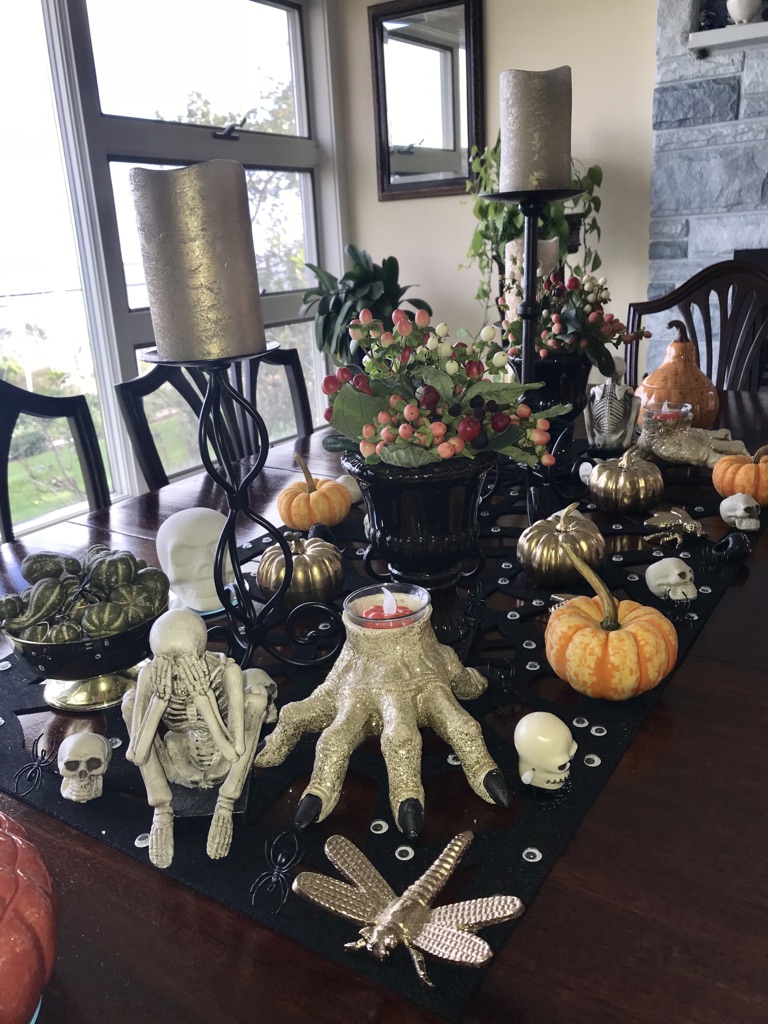
I also spray-painted four artificial pumpkins gold (don’t use real pumpkins that will go bad and get mushy on the table).
And I purchased the most adorable (to me, anyway) gold insects for the four corners of the spider runner. I figured they could work for a multitude of future tablescape designs. And they have earned their keep. I’ve used them in a number of table decor designs to better create a garden look.
This table style was creepy, elegant, fun.
When all was in place, it seemed to just need something more.
As if a hand was directing me, I was compelled to turn to the fireplace and shazam, my eyes caught the four wrought iron candle holders. Perfect!
They and their gold, battery operated candles were soon transported to the tablescape.
That finishing touch really completed the look.
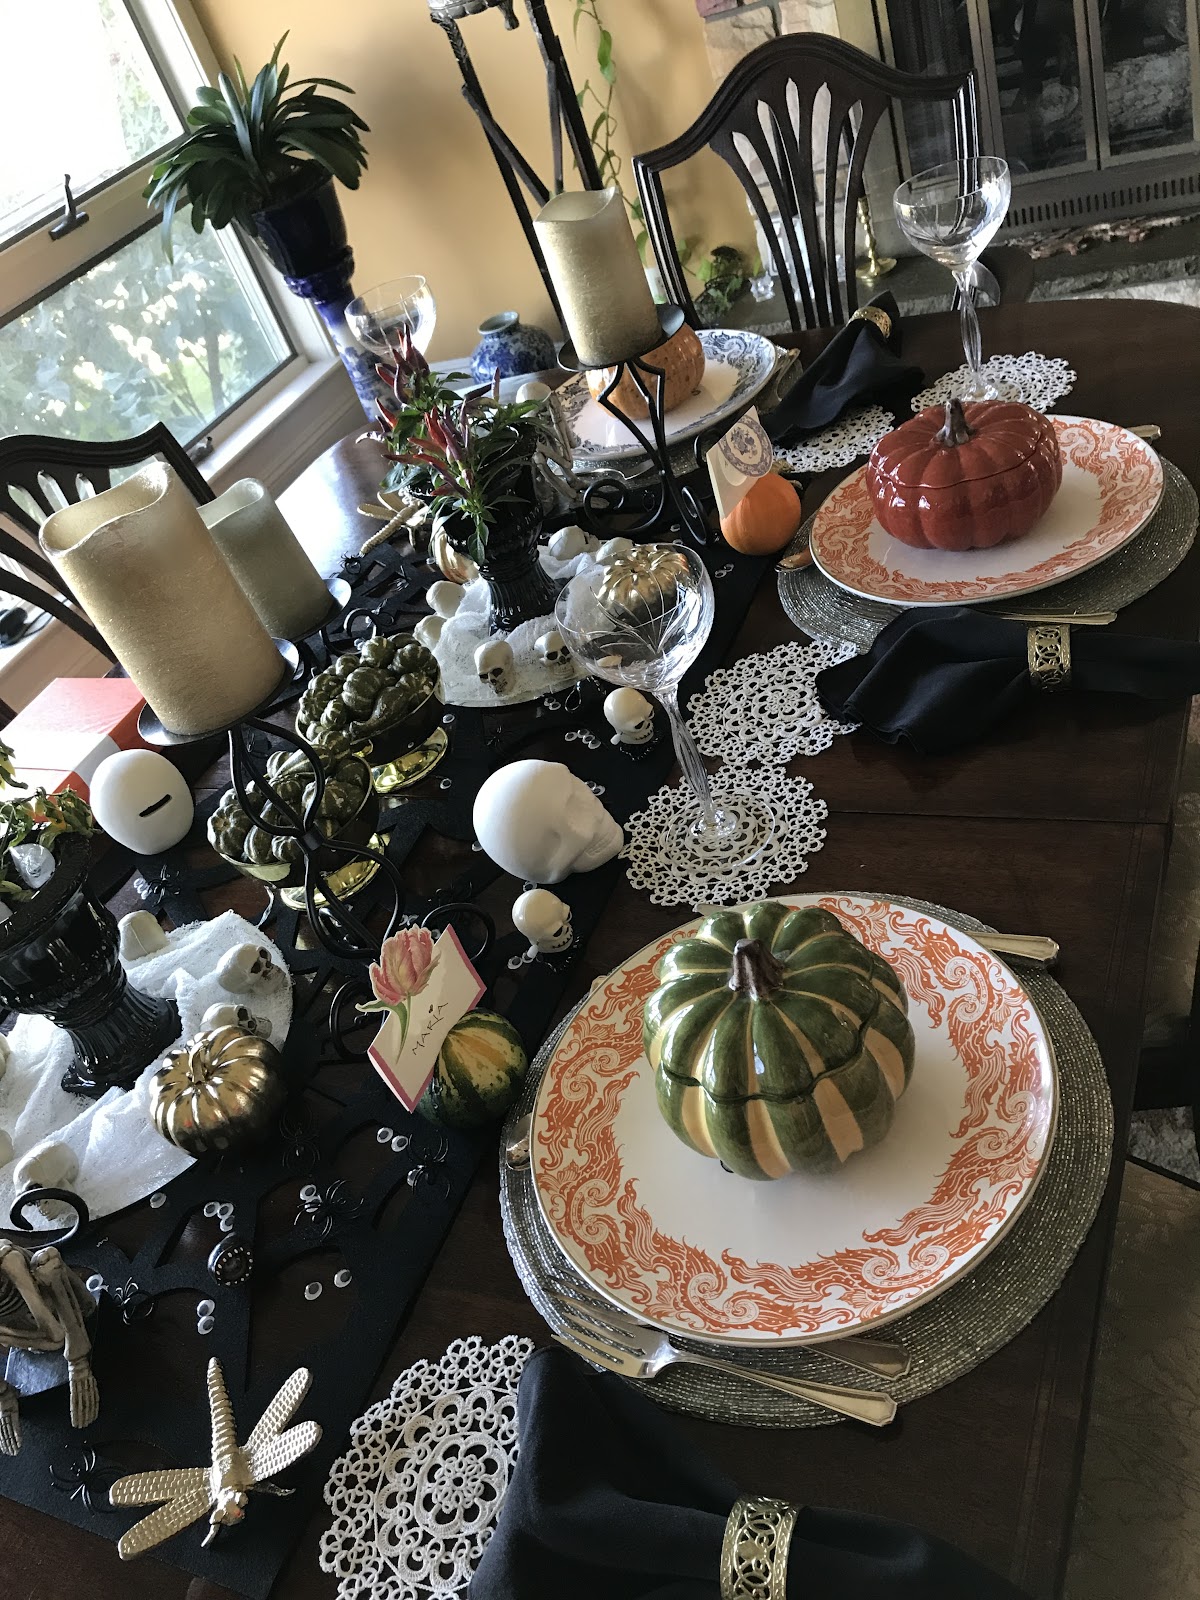
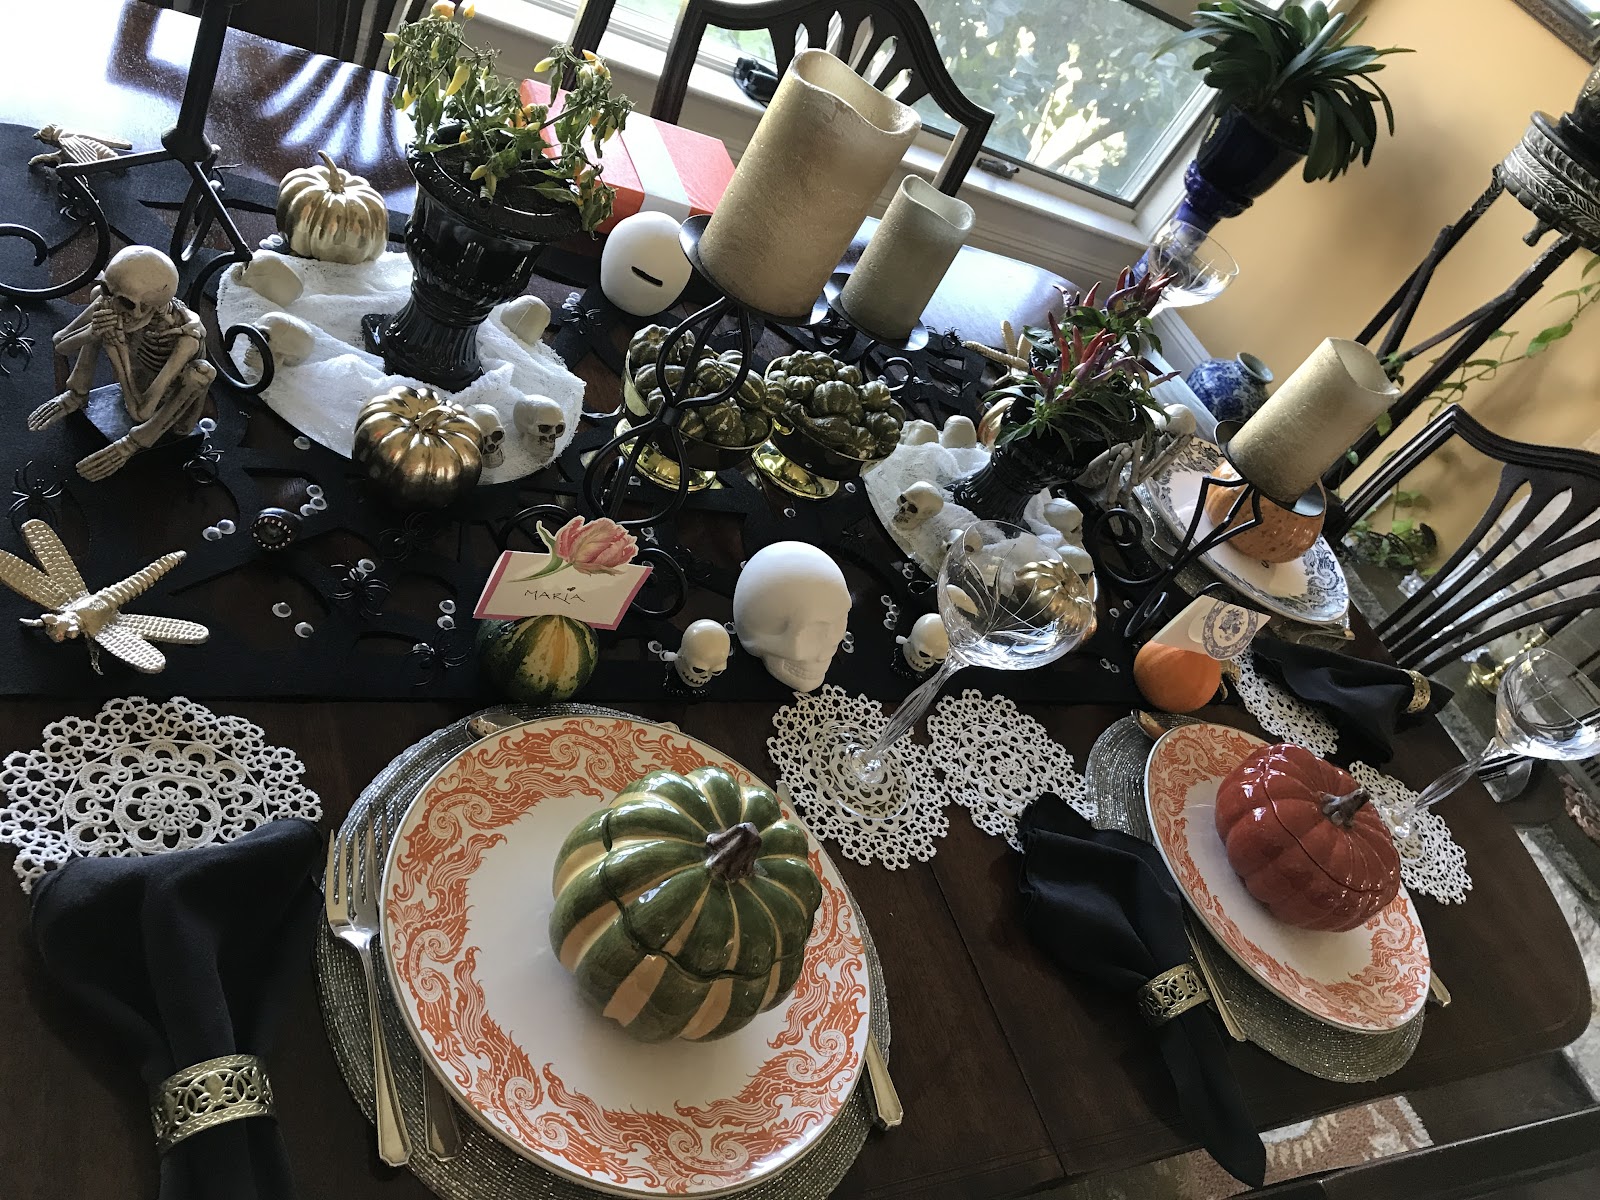
Halloween Luncheon
Now for the dining.
For a “Ladies Who Lunch” affair for some dear Garden State friends that year, I found mini-gourds and pumpkins from our garden and used them for the seating, name placeholders. Sweet and seasonal.
Black napkins and gold napkin rings accented the table look, as did the ceramic gourd soup bowls (Williams-Sonoma).
The seasonal menu included most everything from our garden: onions for the French Onion Soup:
(Photo courtesy, Angie Lambert)
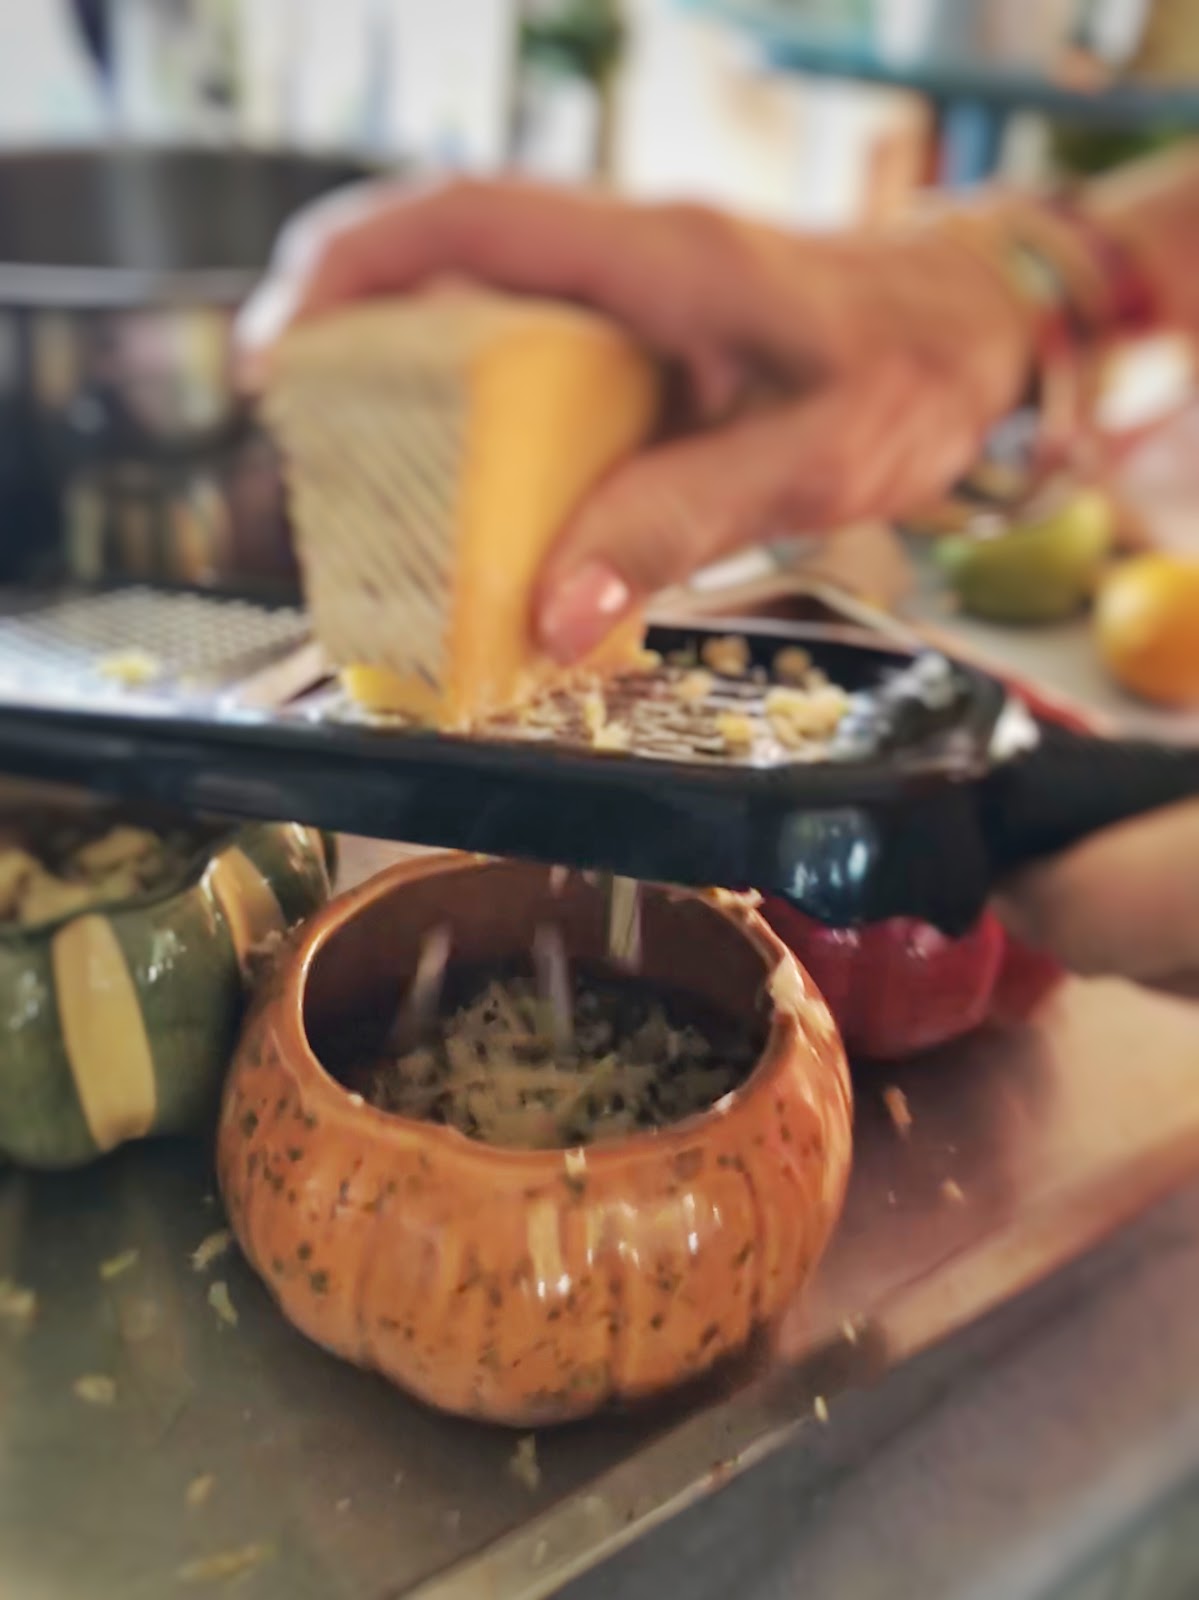
Fresh-grated Consider Bardwell Farms Rupert cheese - An aged, raw Jersey cow milk cheese inspired by great European Alpine cheeses like Gruyère and Comté added rich, salty taste to the homemade soup.
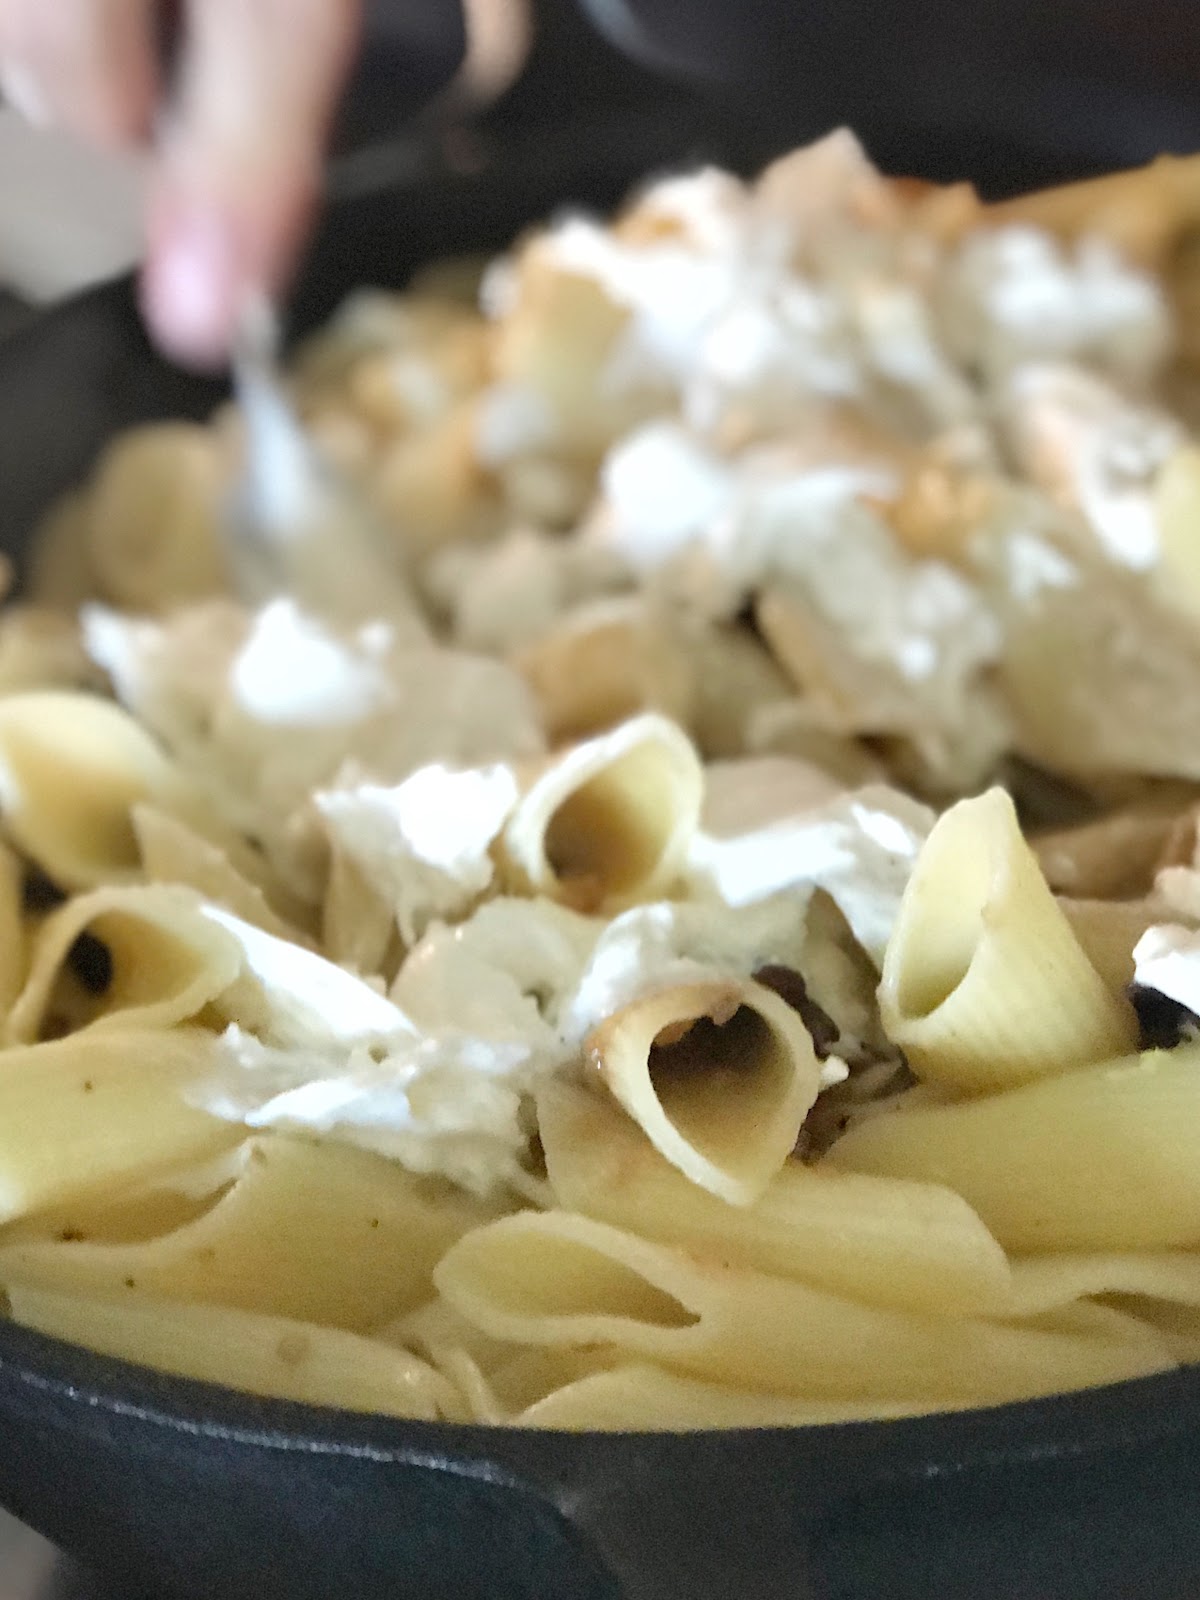
We enjoyed Mother’s homemade bread, and garden-fresh eggplants for the Eggplant and Pasta with truffle buffalo mozzarella entree.
(photo courtesy, Angie Lambert)
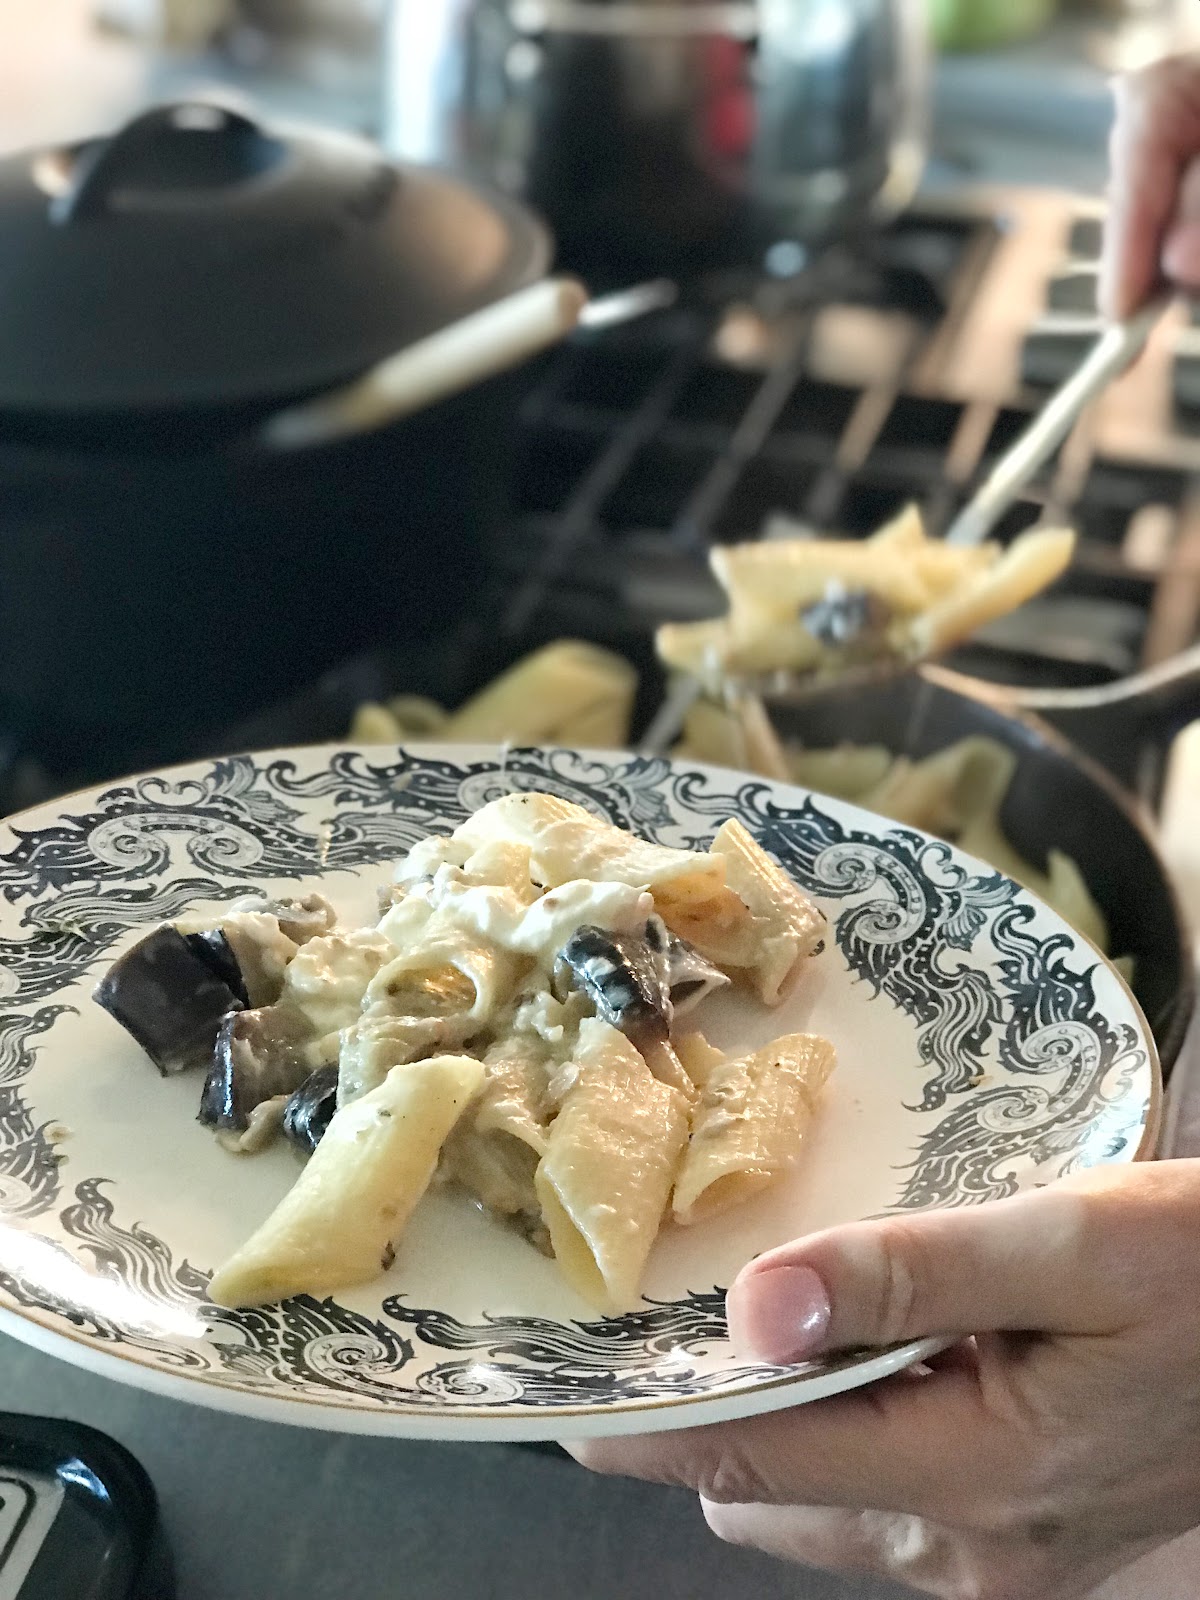
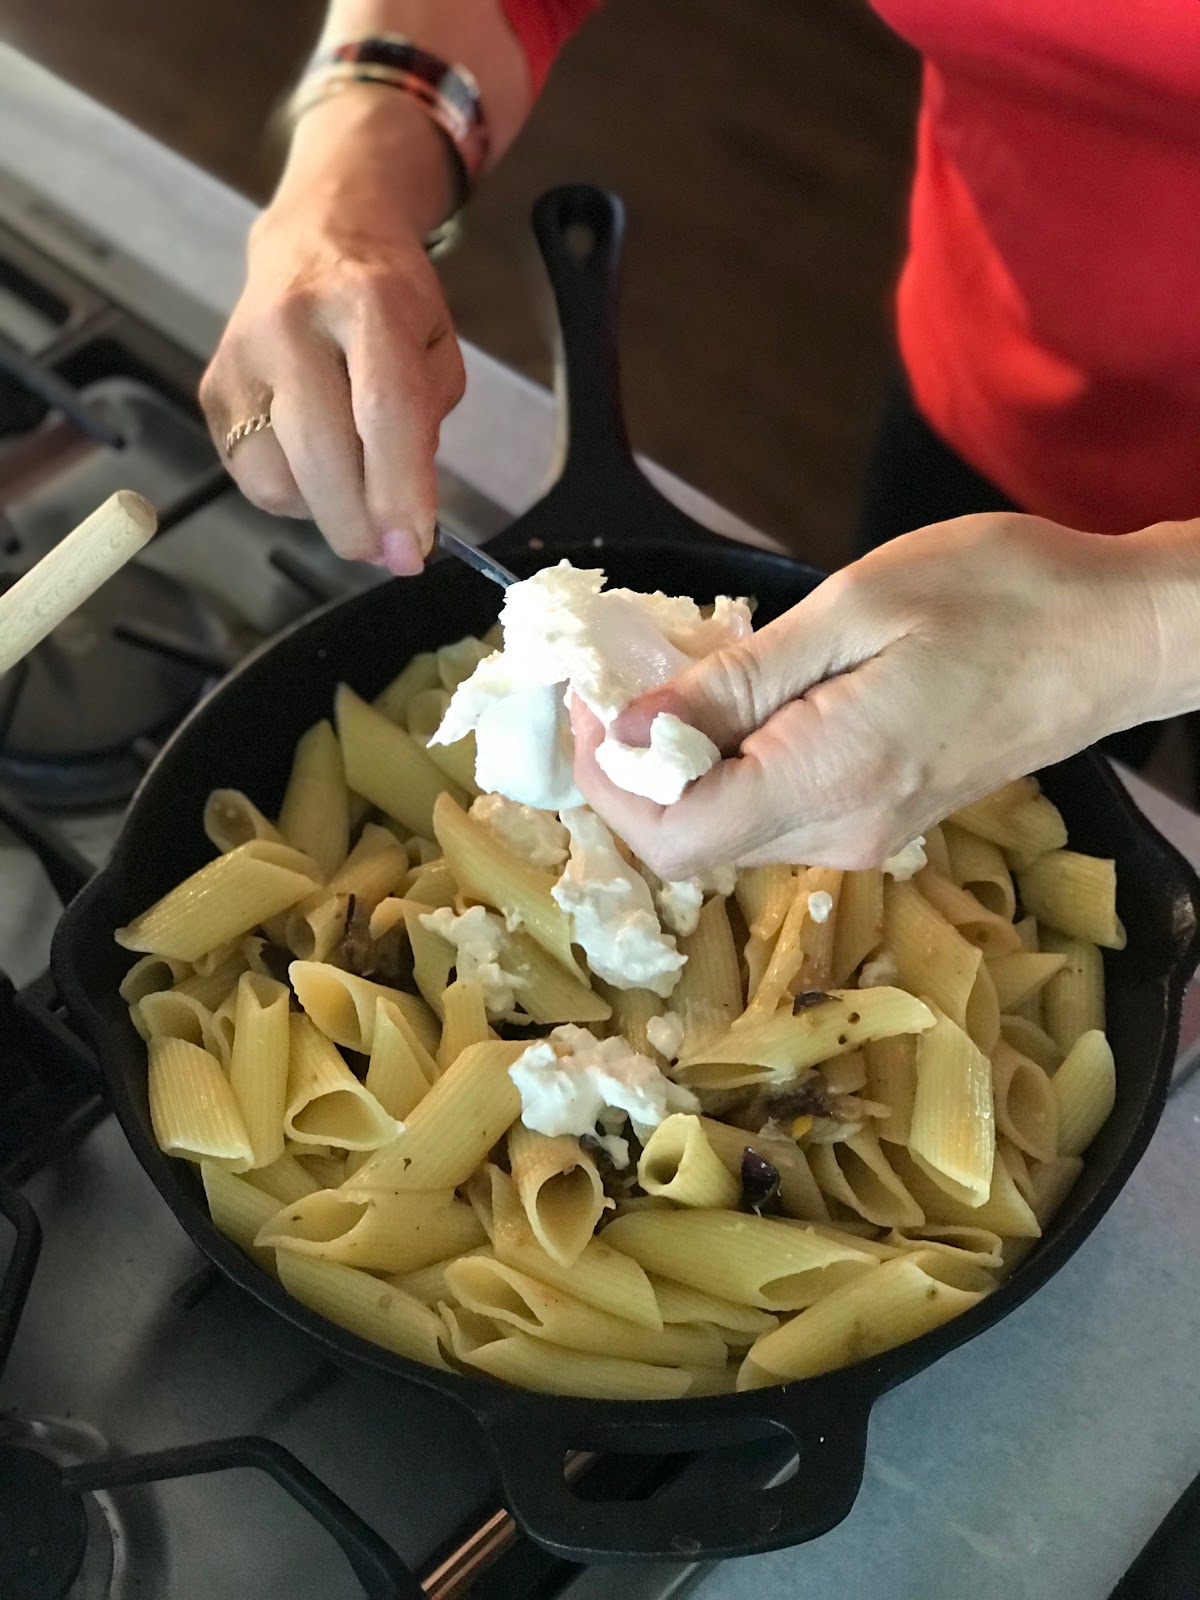
Photos courtesy, Angie Lambert
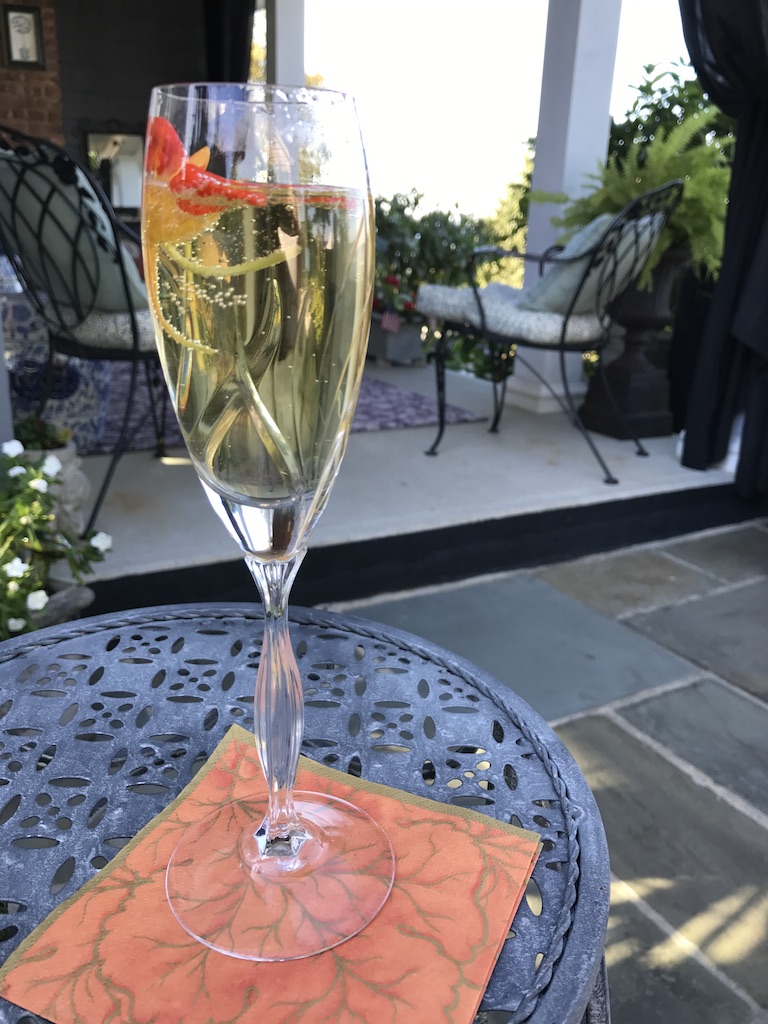
I couldn’t resist making my trademark punch with a garden ice floating ring for the Ladies’ Lunch.
(Photo courtesy of Angie Lambert)
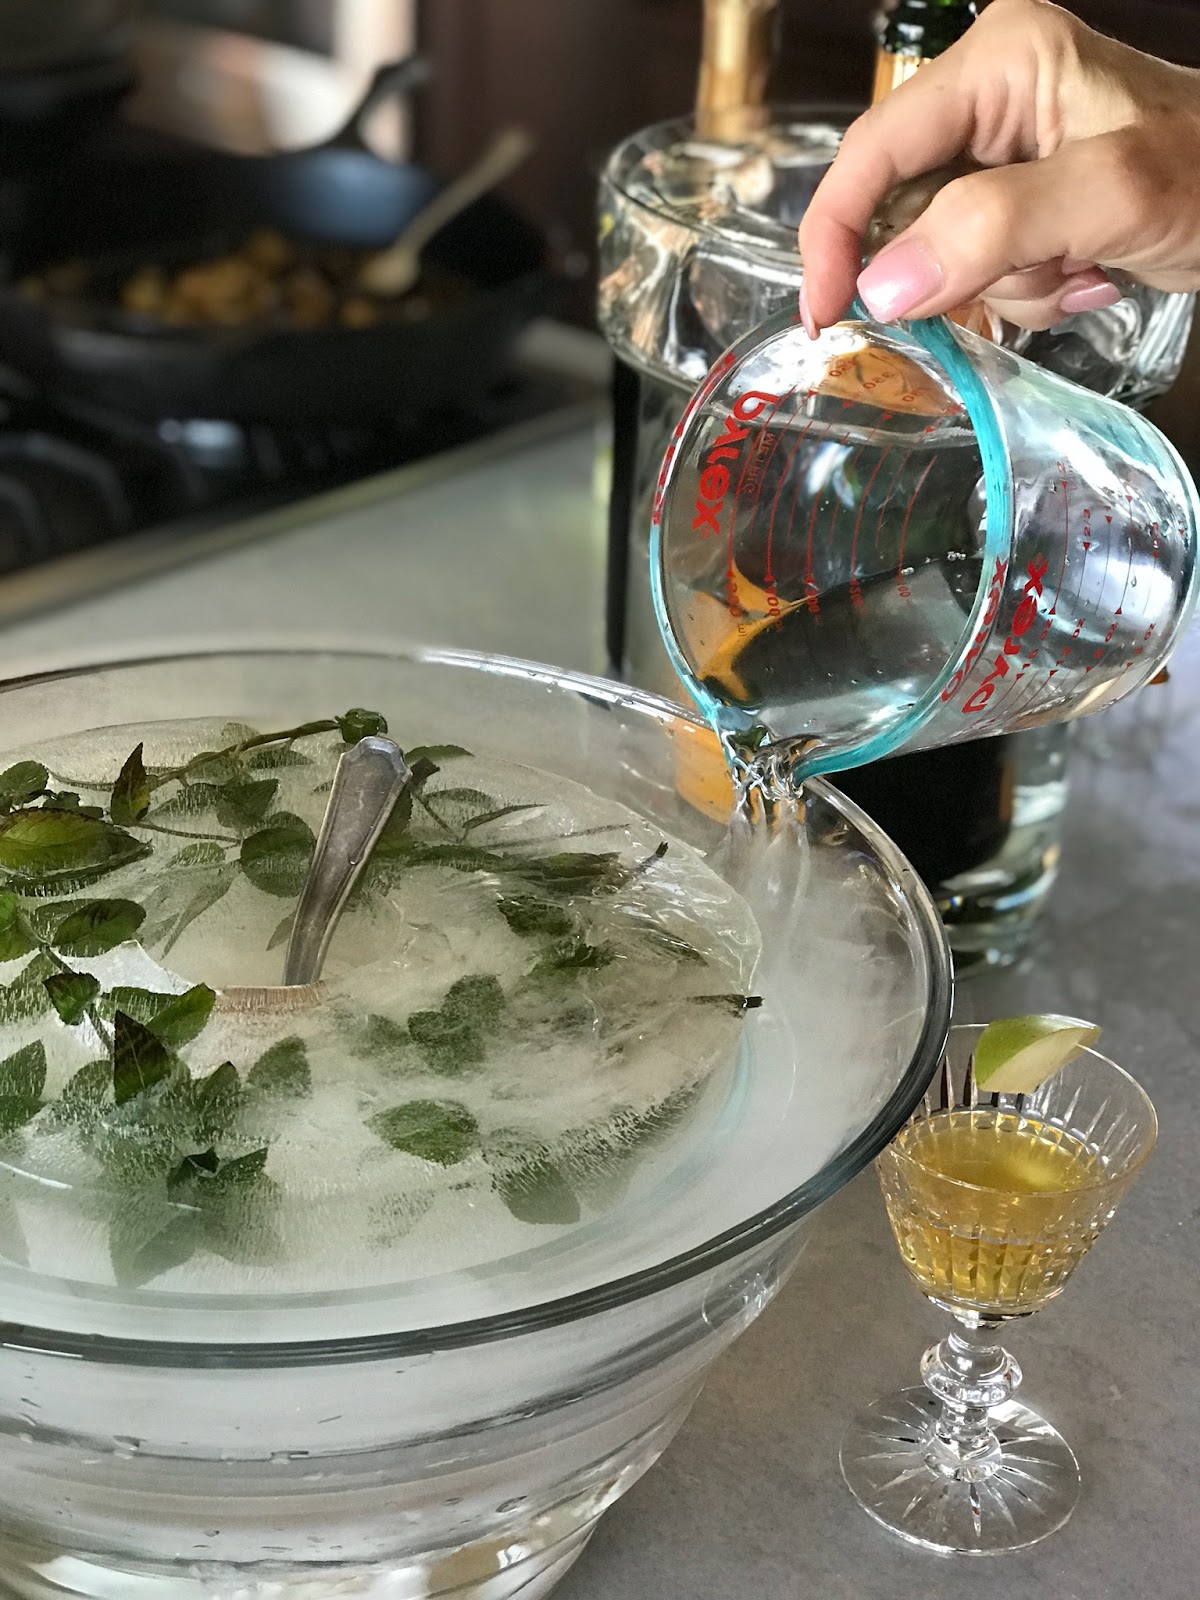
Here, I used our garden mint as the frozen greens in the ice ring. As the ice melts, the greens or blooms just expand and float atop the punch. It’s quite lovely. And always elicits oohs and ahhs from the guests.
To achieve this look you need to start the prep process a few days ahead of time, freezing distilled water halfway in a bundt pan.
When frozen, place your greens, blooms, herbs, or flowers or whatever you want that will amplify a party theme - on top of the half frozen mold.
Then, fill the bundt pan with more distilled water to help cover the greens or flowers. Some will stick up from the mold -- which makes it all the prettier.
As the ice melts, the greens stay in the circular shape -- so that it comes to rest in the bottom as the punch is consumed. A garden-to-glass delight for any seasonal or special celebration.
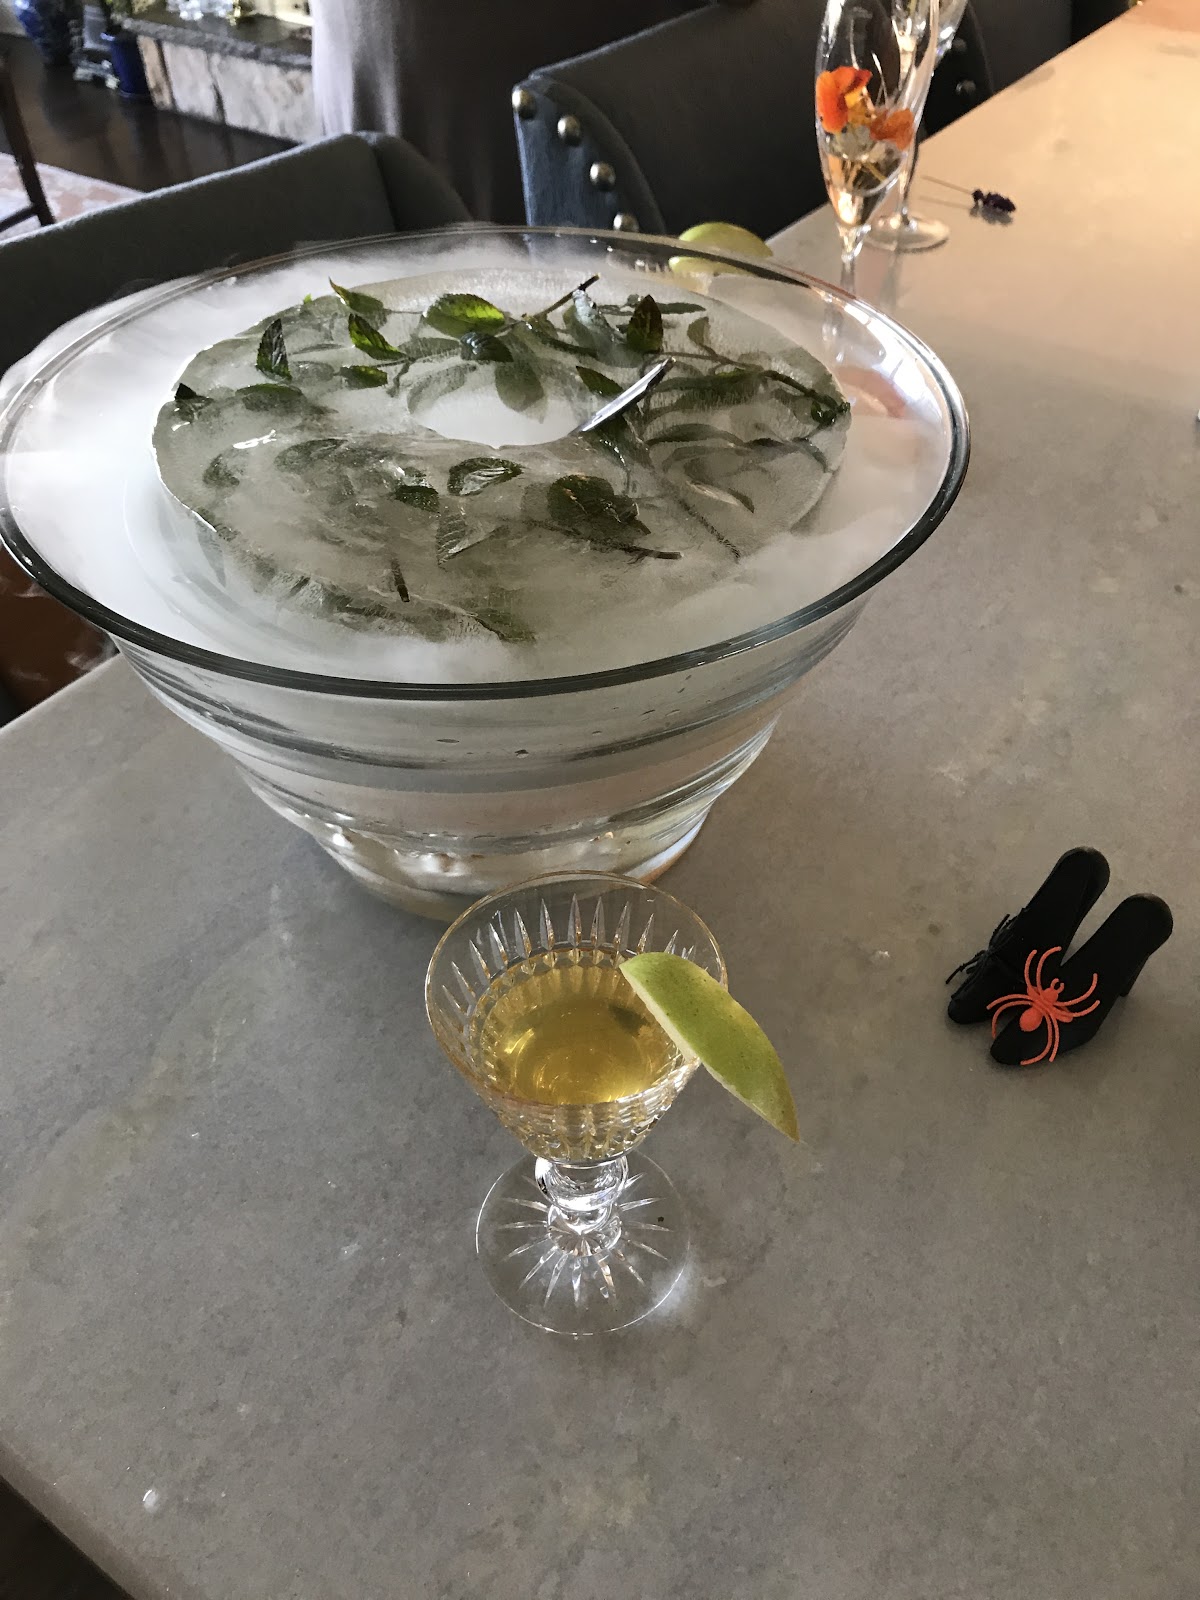
For Halloween, I had to try the dry ice to produce a holiday, smoky drama.
I ordered the dry ice from our local Party Store. They told me I had 15 or 20 minutes to create the experience once I broke up the ice. Be sure to wear winter gloves when doing this.
You then ignite the dry ice with water.
My smoky look lasted about a half hour or more.
The result was even better than I hoped for. It was giggling-good!
I encourage you to try this hostess treat for your next party.
I garnished the apple cider punch cocktail with fresh, local green apples.
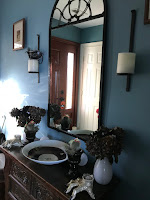
Entry Hall
For the hallway table, I already had two “hands” that look like Thing from the long-ago TV show, “The Addams Family.” (They’re creepy and they’re spooky…)
I was also inspired by those “menacing-looking” spiky, small succulents.
Heading to our garden, I cut the spent hydrangea macrophylla -- the ‘Lady in Red’ cultivar offers gorgeous petioles and a red-veined style that I interpreted as a bit of blood-red color that paired well with the black “eyeball flowers” I arranged in the black vases.
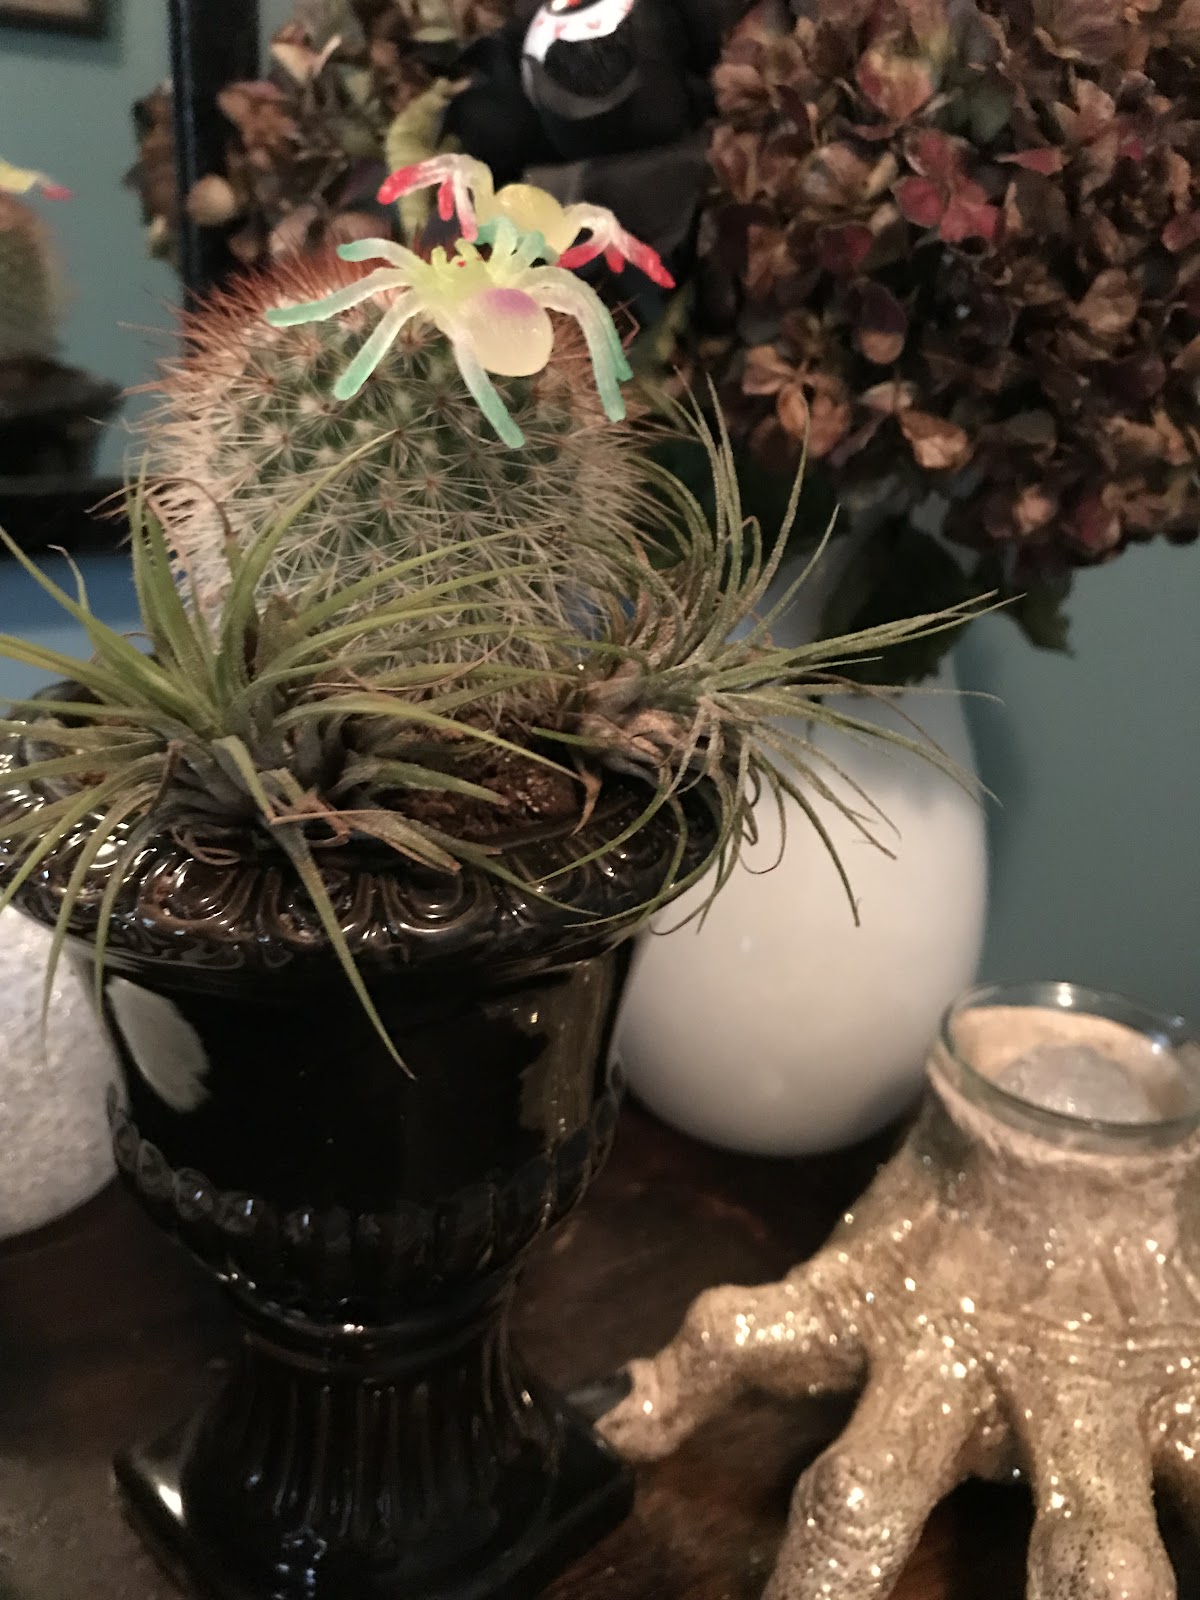
I purchased glow-in-the-dark rubber-like “insects” that rest on the prickly succulents and red-swirled Murano glass bowl that is perched atop the antique Asian table there.
The “Thing” hands are sparkly, with an insert for a candle; I put little light globes in them.
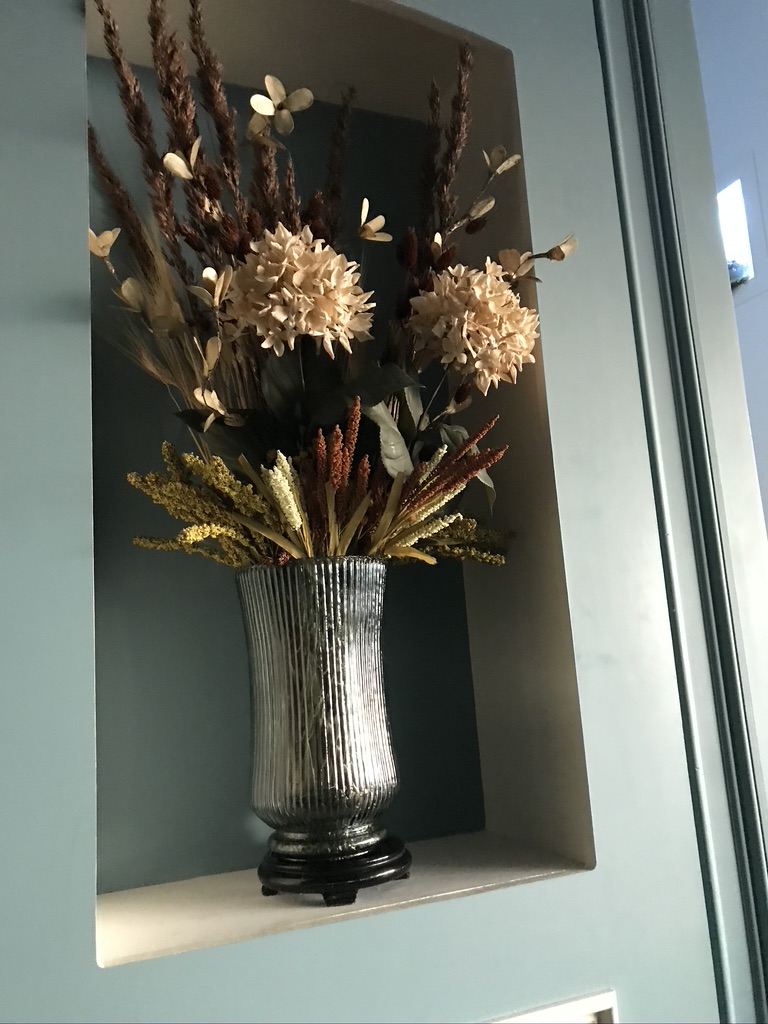
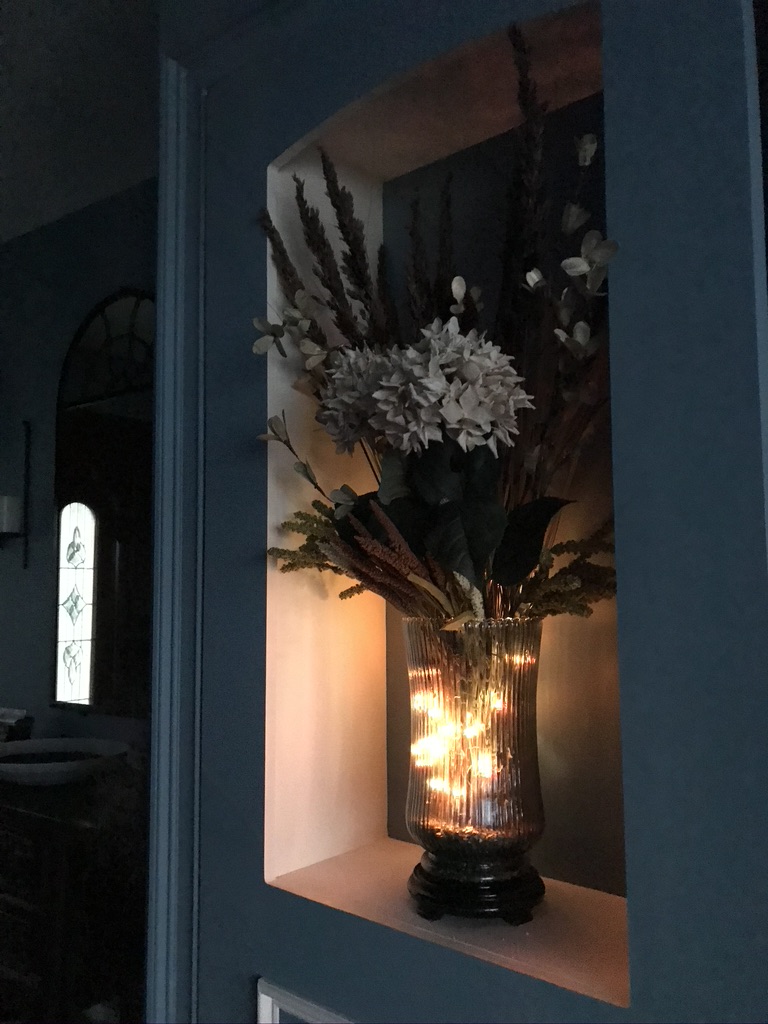
Next, I selected a variety of silk and faux florals to create an abundant harvest look for the alcove in the hidden door to the speakeasy.
I placed a string or two of lights inside the vase to create that warm evening glow.
Front Door Entry
For the front door entrance’s black urns -- one on each side of the front door - the ferns are still looking good in this warmer than usual weather, “Hotumn” as it's been referred to.
Because I already had two happy witches, I nestled our girls in among the ferns.
To add to the look, I got two Mexican, Dia de los Muertos skull heads to place in the big urns along with the witches. I love their colorful look and the significance that they represent prayer and remembrance of family and friends who have died.
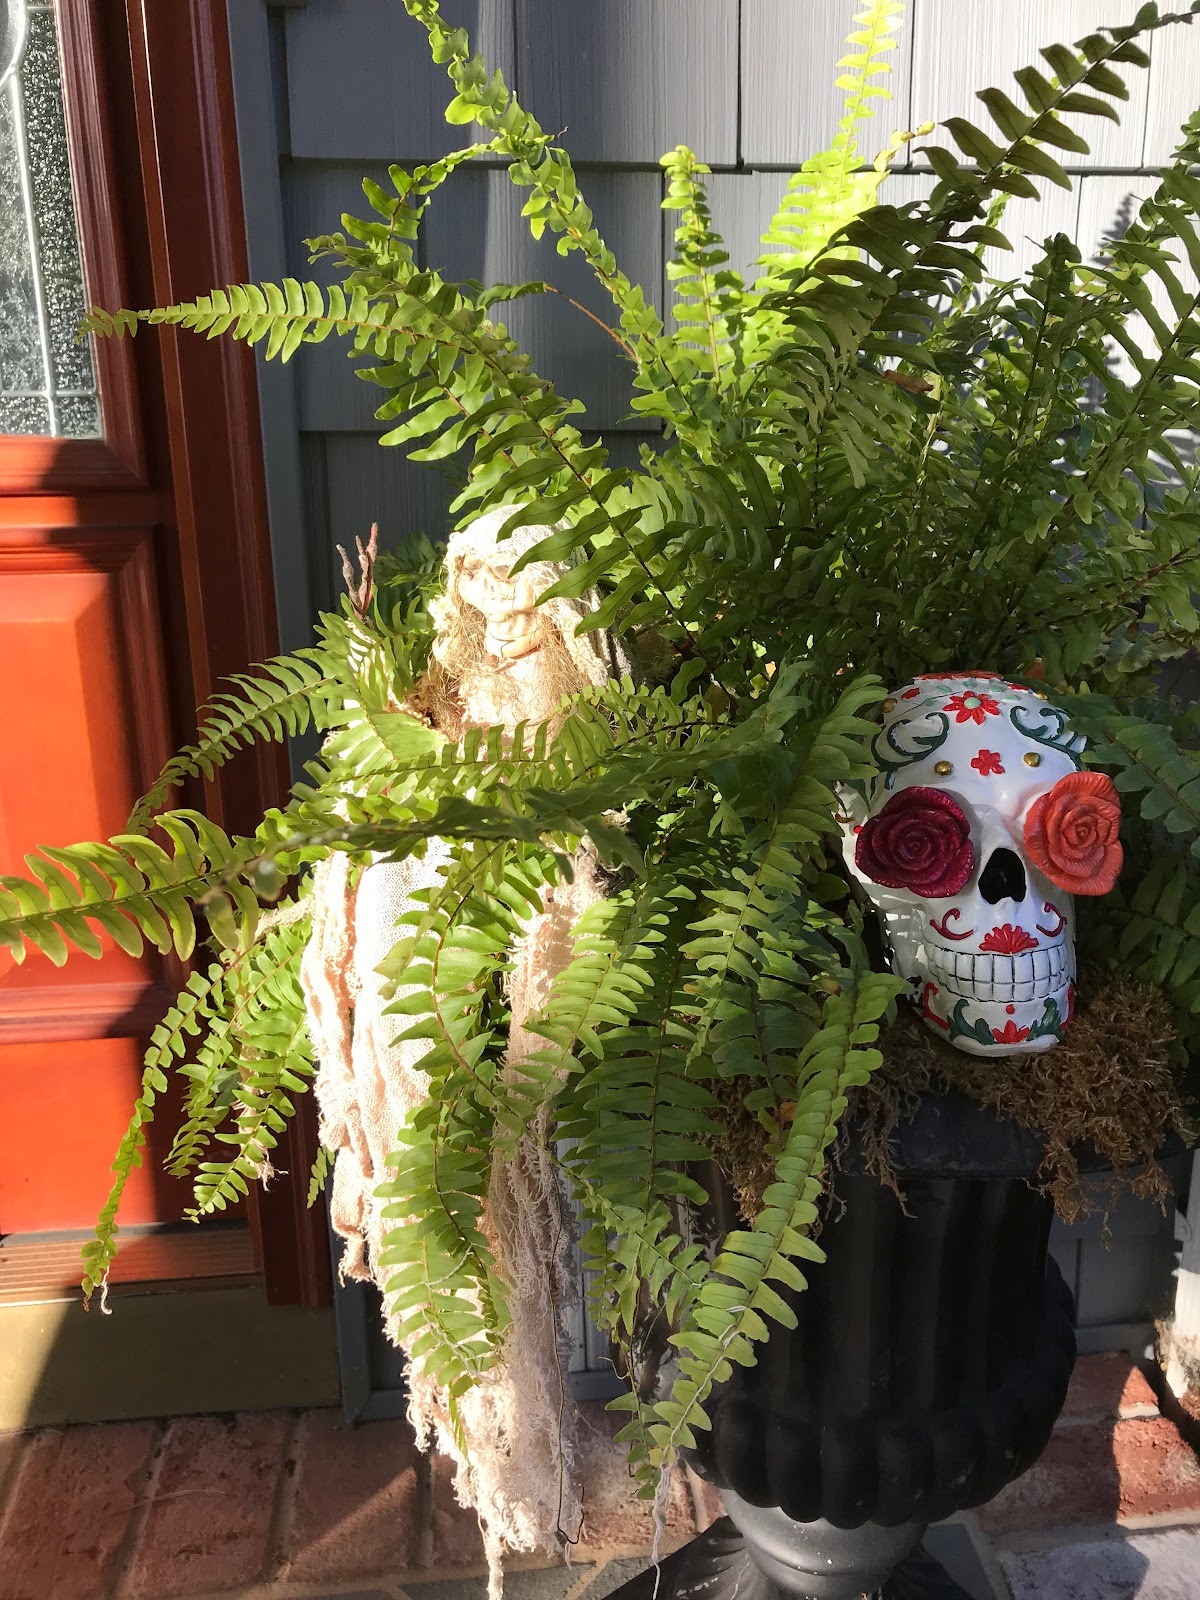
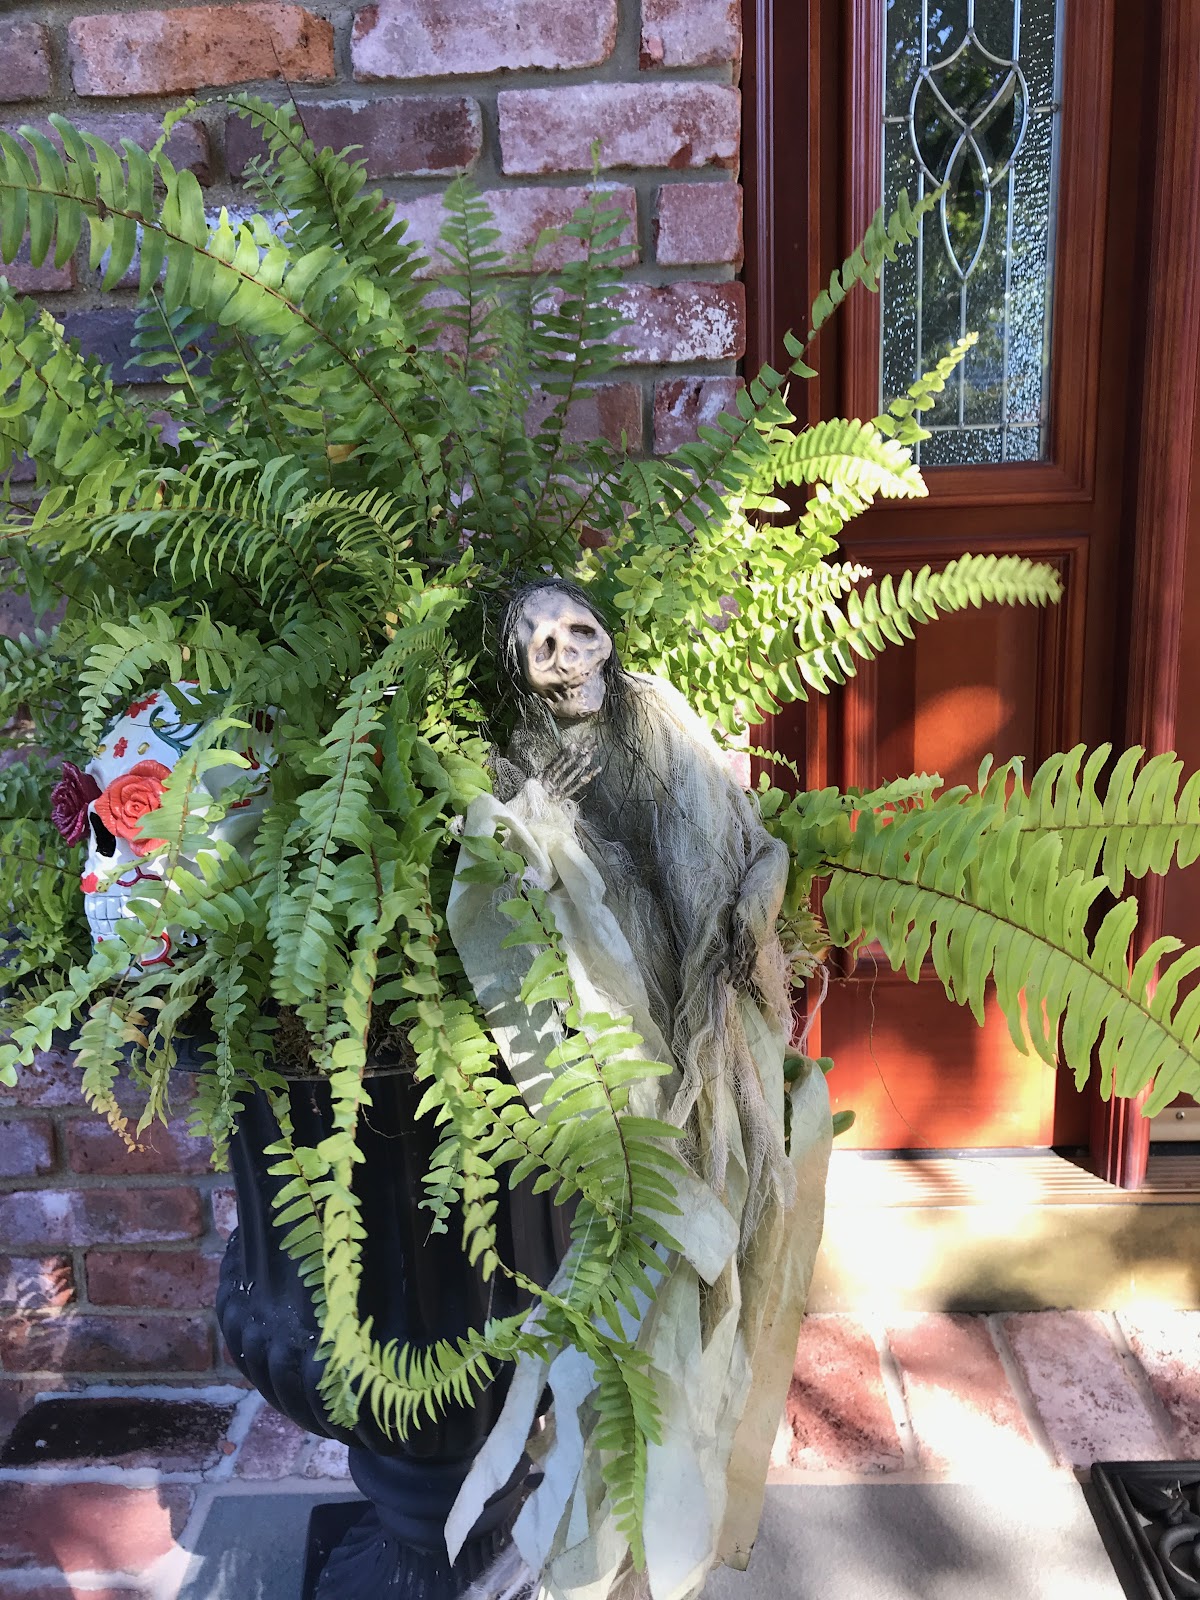
The PS / funny part is that the squirrels knocked out one of the skulls - but the glue job with a now-cracked skull, made it only look all the more spooky!
(I’m a glass half-full kind of girl :)
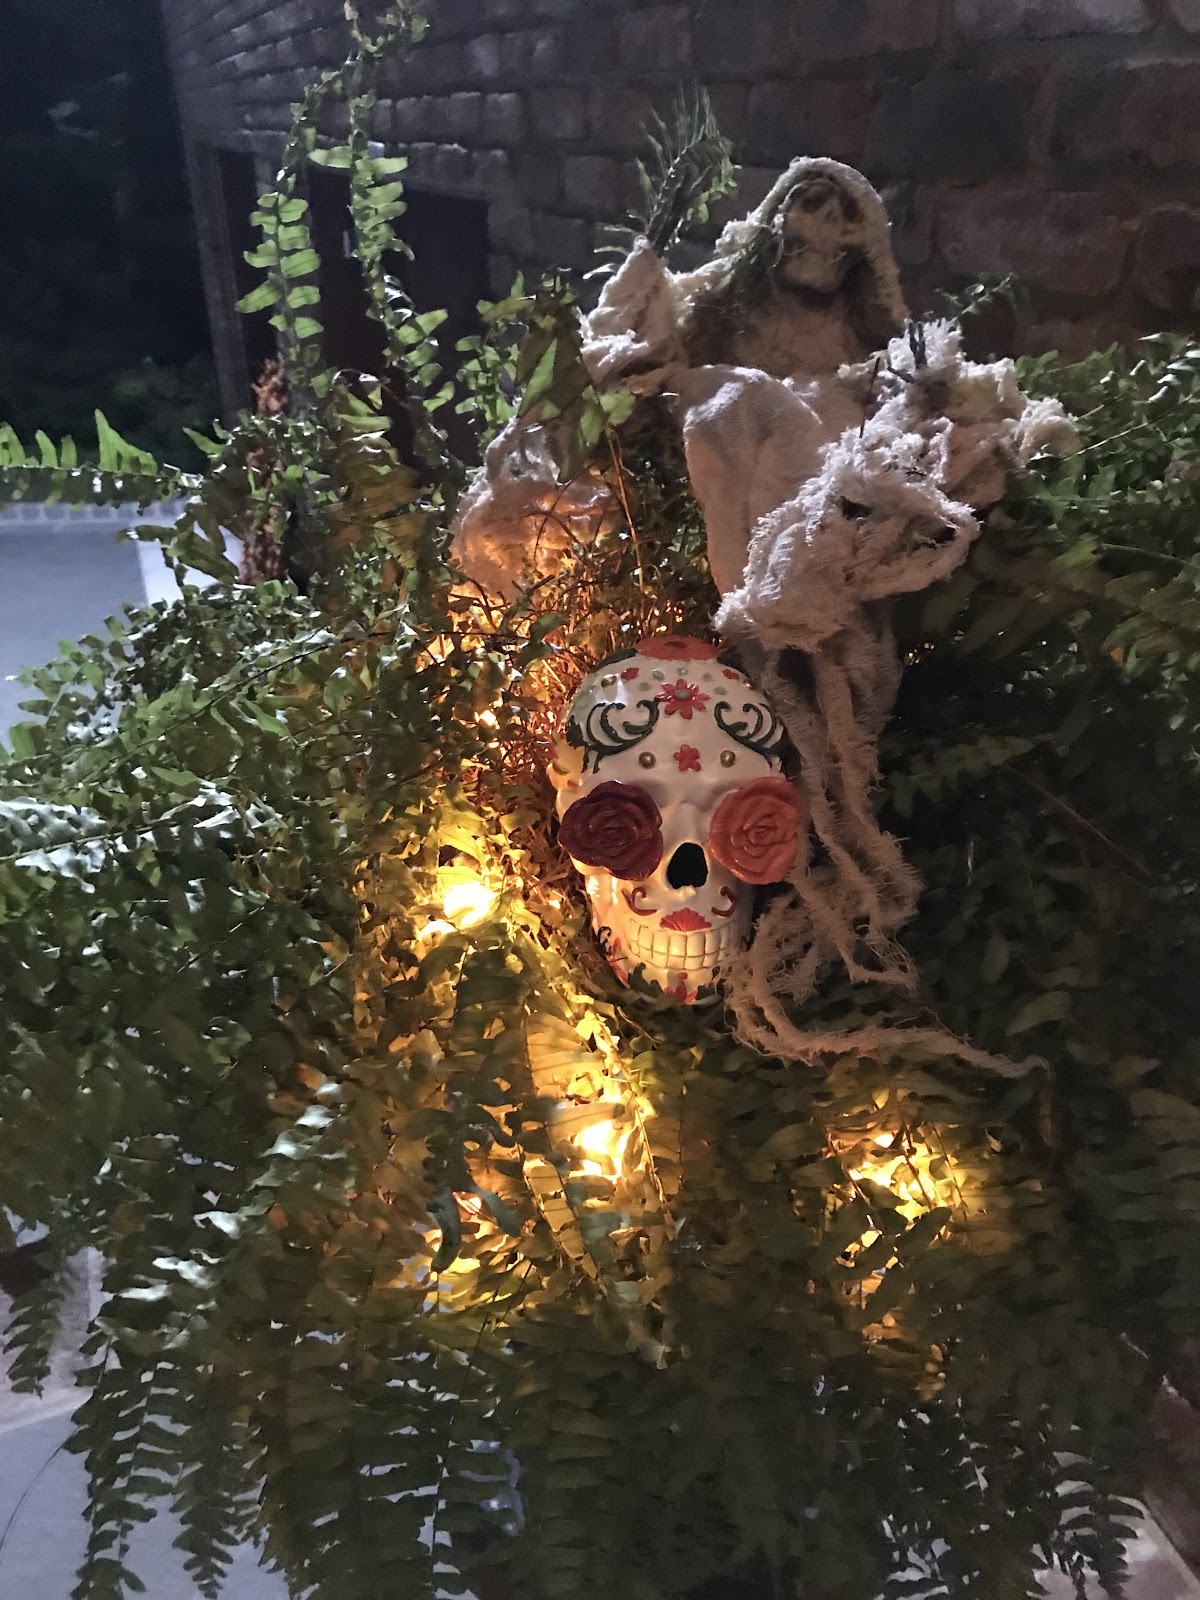
A string of pumpkin fairy lights illuminate the ghoulish but welcoming entry.
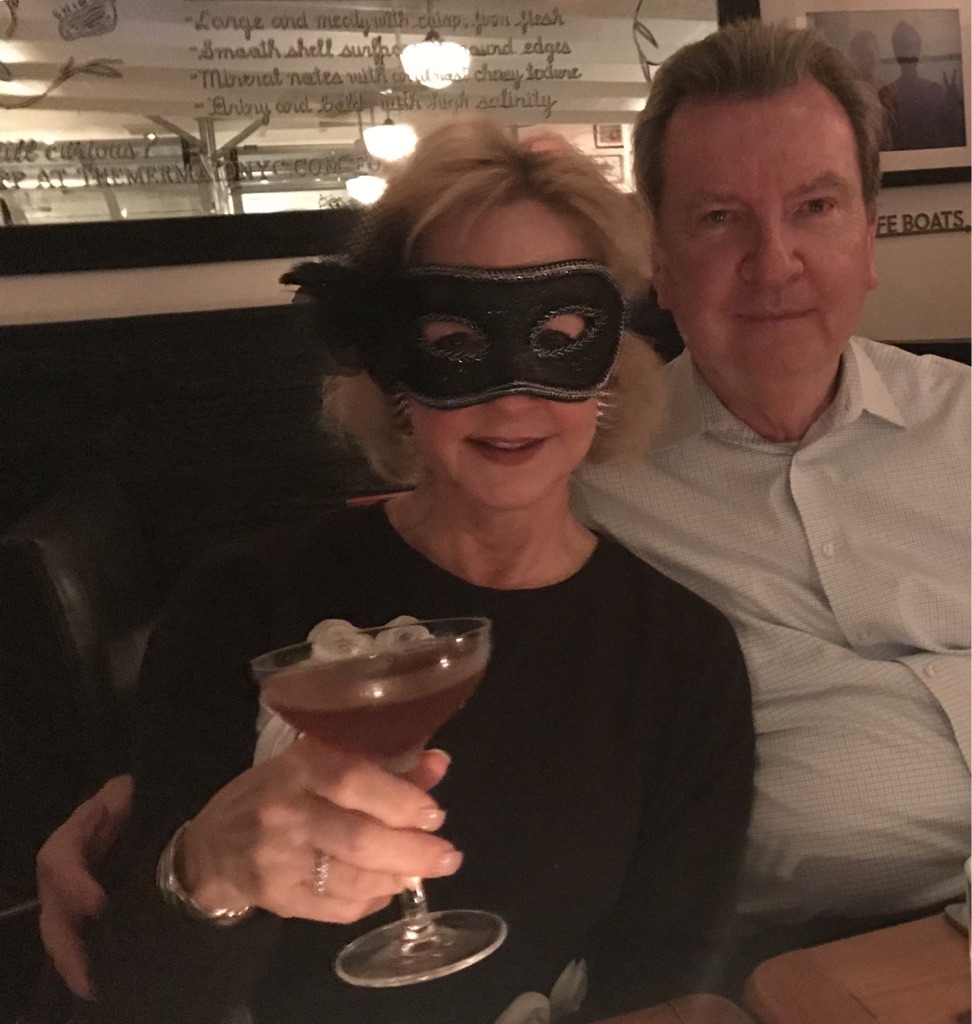
Boo to you! What will your table be wearing for Halloween?
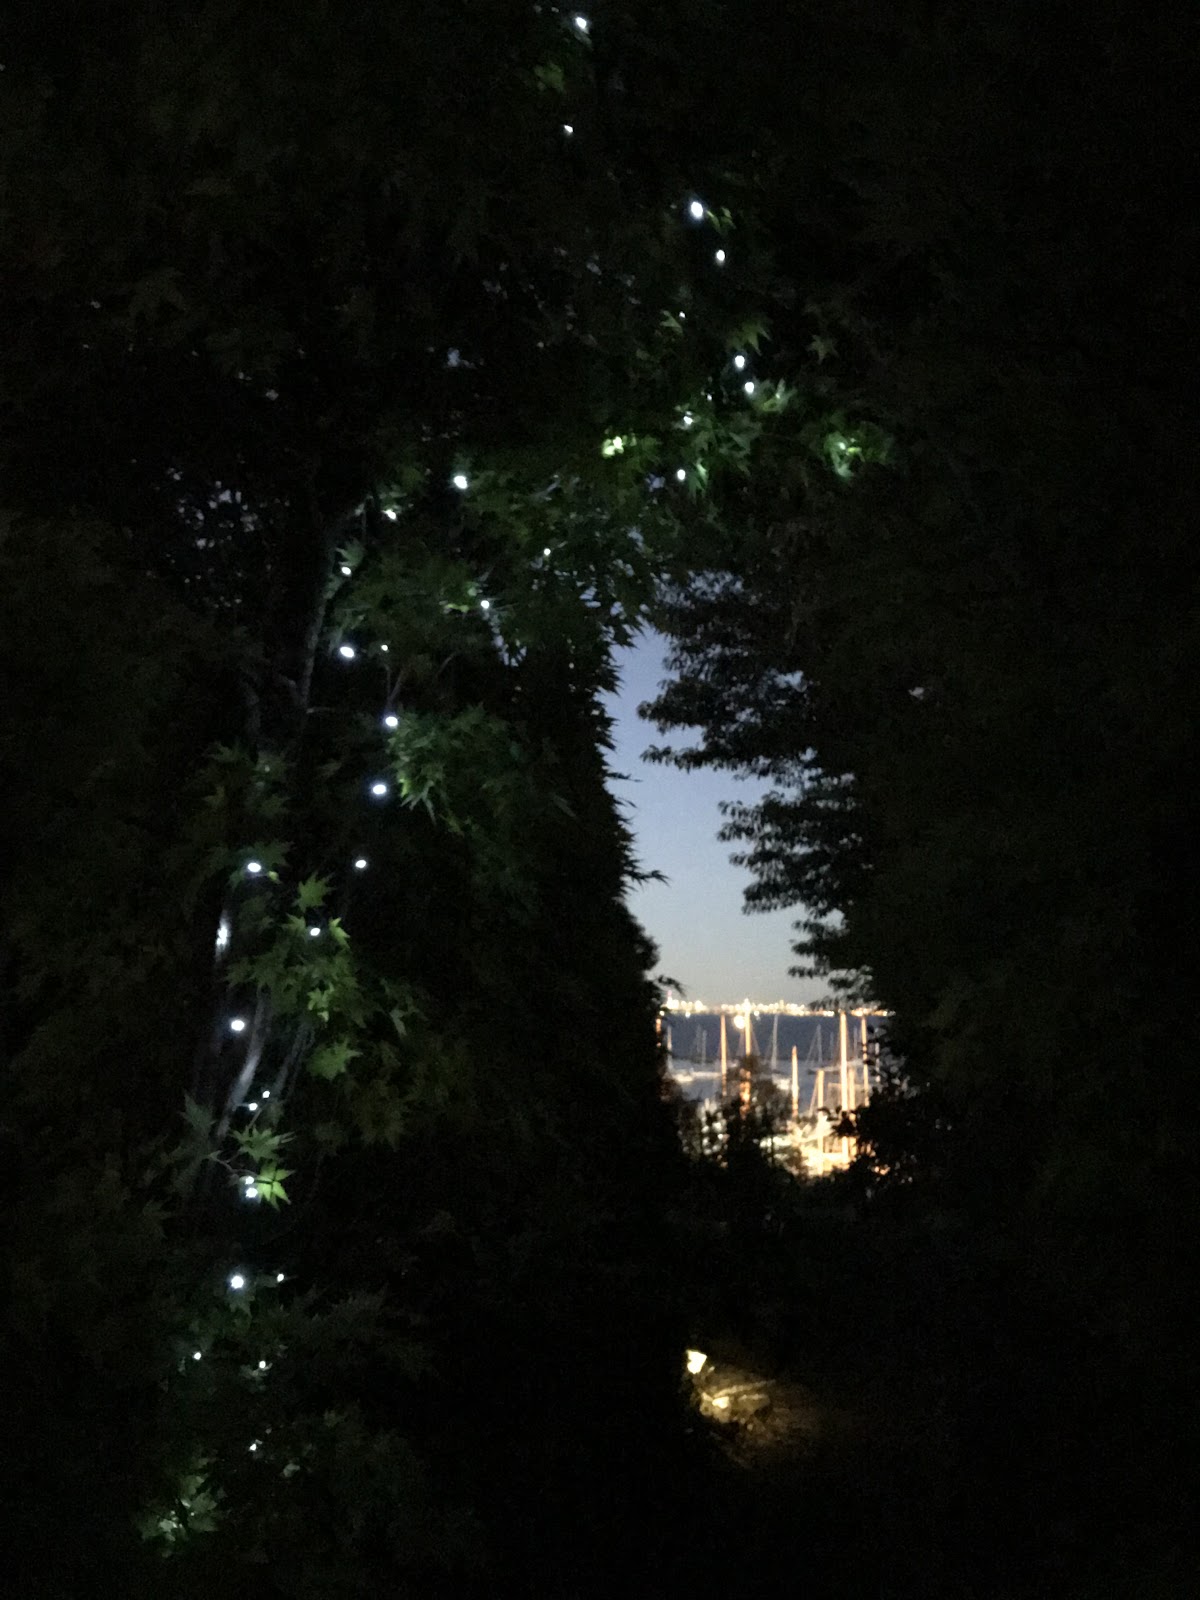
And the arbor twinkles with a view of the harbor just beyond. Romantic...
Here is me and Bill in the not too distant past, celebrating some fun and Halloweens.
Be sure to mix up some seasonal drinks to celebrate Halloween and the Harvest season. I’ll share some of my drink recipes in the next Post.
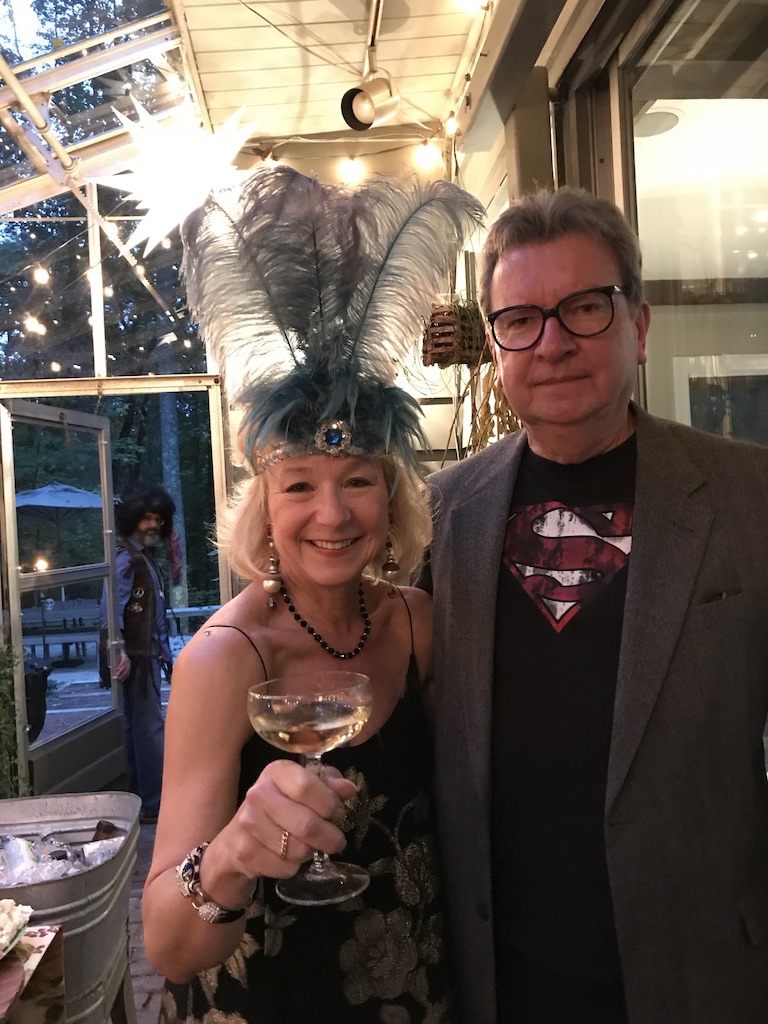
Cheers to a glamorous Halloween.


Great ideas as always. Keep up the great work.
ReplyDelete