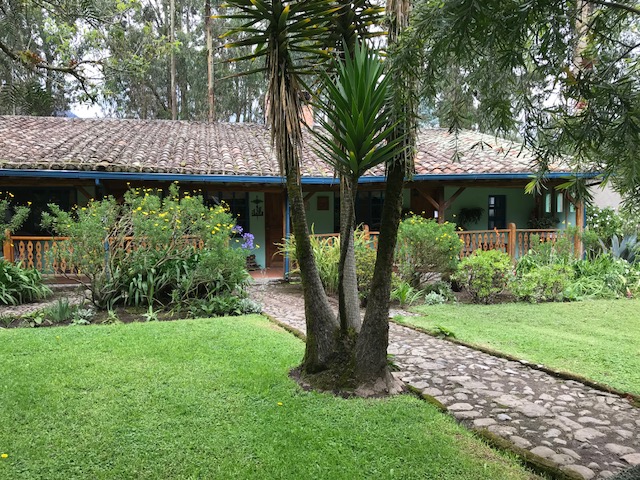
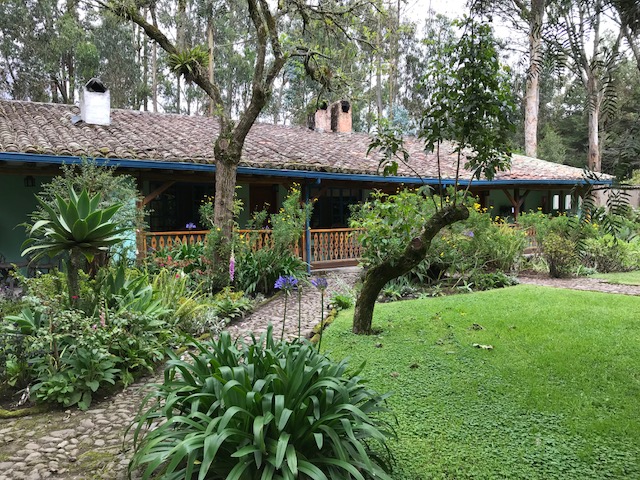
It occurred to me while I’m working the gardens again this year at the extraordinary Hacienda Cusin located in the mountains of the Ecuadorian sierra that there are lessons for all about designing a garden that has more to do with editing out, cleaning up, scale, texture, color -- in other words, all the same elements that go into a great garden design plan, but using existing plants from the garden bed or your extended property.
Moreover, it’s about taking out, pruning the plants for health and looks, and moving plants for pretty much the same reasons.
It doesn’t take a lot of tools to prune and edit; here I brought with me just four: a hand trowel, a small hand-held cultivator, a foldable pruning saw, and of course, my ever-present lightweight, ARS snips that I first read about on Margaret Roach’s “A Way to Garden.com.”
I can’t recommend these razor sharp grape or needle-nosed pruner snips too much. Margaret wrote: “I haven’t used my pricey, famous-name pruning shears in weeks and weeks.” I know why once I got the ARS snips. I carry them everywhere and they certainly deserve OT!
They do almost every task and cut all but the biggest branches or limbs.
I love them and their Corvette-red grips.
Of course there are rakes and shovels that I need to borrow from the resident jardineros.
And there are indeed plenty of top-tier tools that have been engineered to make garden work easier and more efficient. For example, not that long ago I was asked to review the Radius Root Slayer for Garden Products Review.
Gardens
While I have designed gardens here at Cusin with architectural plans - approved by the owner in discussions back in the States - and we have purchased plants at local nurseries - by and large there is more editing of the gardens.
Why? Because the garden rooms or niche gardens are mature and there is no need to start from scratch. If we edit out a lot of salvageable and preferred plant material that we don’t want to compost, we simply create a new garden bed in an unused area.
Things grow super fast here in paradise so there’s essentially no need to worry about making a big mistake when editing or removing or pruning…
It’ll grow back in a New York minute, it seems.
Editing
There is approximately eight or nine+plus niche garden rooms I was tasked to work on in terms of updating or refreshing the garden designs.
After a day or two of garden work, I realized my design training and aesthetic kicked in as if on auto pilot.
See, it’s not “just” horticulture - although that is the number one, overarching concern: the welfare and health of the plants.
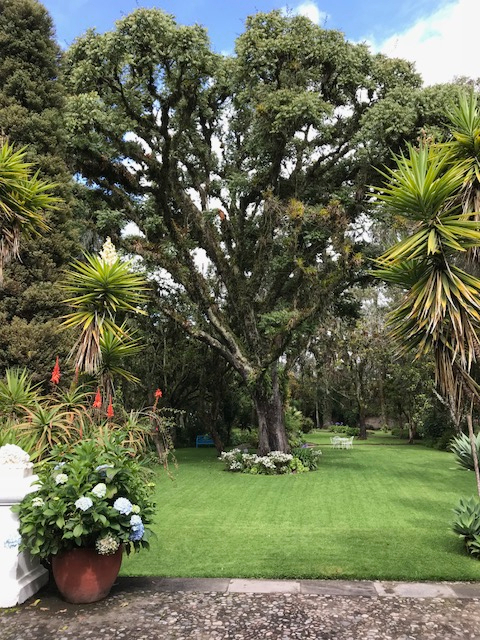
The other, seemingly obvious element is the look - do the garden beds look picture perfect? And I defy anyone to stop taking pictures here at Cusin. I must have hundreds (or more!) And I see the guests walking the garden grounds transfixed at the incredible beauty of the plant combinations and birds and bees and hummingbirds!
What to Do - Easy Steps to Successful Editing
First there is the need to do a Site Analysis.
Do an inventory - whether you digitally record the plants in the garden space - or write down the plant names - it is better to keep a garden journal and track the plant’s progression as they grow and age and also note their relation to one another - to other plants that you’ve added or that the birds or other pollinators have. The botanists referred to it as “the poo factor!”
I suggest you add a photo of the plant next to the plant’s name so you can more readily identify the plants later on.
I can also heartily recommend Grow It a mobile-based App that allows you to search for plants, create a project, share your plants and flowers or search for plants - using a crowd-sourced community too. I first met the developers/founders Seth Reed and Mason Day some years ago at a Green Industry / Hortie Hoopla event at The School of Professional Horticulture’s annual happening at The New York Botanical Garden (NYBG).
Tracking the garden plants is especially important in an era of climate chaos.
Things just ain’t what they used to be…
Therefore you - and all us - need to see what the “new normal” will be over an extended timeline given the extremes we’ve experienced the last few years.
If you contract with a garden designer - he or she is probably already doing a Site Analysis and the tracking.
Showcase Your Garden with a Garden Tour
Plus, plant lists are fun to showcase when guests visit.
You can provide a garden tour and/or have the content available on a print-out, photo album, or provide a digital copy to download - so the guests can take a self-guided tour.
I keep a number of copies of my garden’s plant lists, by garden room, along with the photo of the plants which are all labeled.
I wanted to do this for a recent Historical Society event when our gardens were featured as part of the tour and I thought it would help our visitors. Following that, I found it a great aid when family and friends visit and want to tour the gardens.
Think of it like this: you’ve worked so hard to make this living work of art something you want to delight in, as well as your houseguests - so don’t be shy. I was honored to provide a garden tour for one of my garden design clients at her annual summer family party. They loved getting acquainted with the beautiful gardens and plants...
People get very excited to see and experience a good garden. It’s your story… Share it.
Gardens Naturally Change
Because gardens are dynamic there will a natural, organic rhythm of change…
Add in the effect of plant companions, pets, extreme weather - and let’s face it, neglect, and you have a situation that more often than we care to admit, needs attention.
I see far too many suburban homes that are saddled with “Too Big” shrubs that have outgrown their usefulness. They were probably put there by the builder in the first place with no thought other than it’s green and it's a foundation plant.
And I see trees that haven’t been pruned and are now leaning this way or that or are too big in context to the house and yard. Folks just let them keep growing! Don’t do this. Work with an arborist and/or your garden designer.
Editing Plan
Be honest.
Start with the big pruning first -- rid the space of an overgrown, leggy shrub, or tree.
Then stand back. Look at the space. Take a few photos and react to the image.
Gardens
While I have designed gardens here at Cusin with architectural plans - approved by the owner in discussions back in the States - and we have purchased plants at local nurseries - by and large there is more editing of the gardens.
Why? Because the garden rooms or niche gardens are mature and there is no need to start from scratch. If we edit out a lot of salvageable and preferred plant material that we don’t want to compost, we simply create a new garden bed in an unused area.
Things grow super fast here in paradise so there’s essentially no need to worry about making a big mistake when editing or removing or pruning…
It’ll grow back in a New York minute, it seems.
Editing
There is approximately eight or nine+plus niche garden rooms I was tasked to work on in terms of updating or refreshing the garden designs.
After a day or two of garden work, I realized my design training and aesthetic kicked in as if on auto pilot.
See, it’s not “just” horticulture - although that is the number one, overarching concern: the welfare and health of the plants.
The other, seemingly obvious element is the look - do the garden beds look picture perfect? And I defy anyone to stop taking pictures here at Cusin. I must have hundreds (or more!) And I see the guests walking the garden grounds transfixed at the incredible beauty of the plant combinations and birds and bees and hummingbirds!
What to Do - Easy Steps to Successful Editing
First there is the need to do a Site Analysis.
Ask yourself these questions:
How will the space be used?
Has the utility of the space changed over time?
Who will be using the space
What time of day will the space be seen and/or used?
Are there pets who visit the garden?
Can the dimensions of the garden bed be modified? Should it?
Do an inventory - whether you digitally record the plants in the garden space - or write down the plant names - it is better to keep a garden journal and track the plant’s progression as they grow and age and also note their relation to one another - to other plants that you’ve added or that the birds or other pollinators have. The botanists referred to it as “the poo factor!”
I suggest you add a photo of the plant next to the plant’s name so you can more readily identify the plants later on.
I can also heartily recommend Grow It a mobile-based App that allows you to search for plants, create a project, share your plants and flowers or search for plants - using a crowd-sourced community too. I first met the developers/founders Seth Reed and Mason Day some years ago at a Green Industry / Hortie Hoopla event at The School of Professional Horticulture’s annual happening at The New York Botanical Garden (NYBG).
Tracking the garden plants is especially important in an era of climate chaos.
Things just ain’t what they used to be…
Therefore you - and all us - need to see what the “new normal” will be over an extended timeline given the extremes we’ve experienced the last few years.
If you contract with a garden designer - he or she is probably already doing a Site Analysis and the tracking.
Showcase Your Garden with a Garden Tour
Plus, plant lists are fun to showcase when guests visit.
You can provide a garden tour and/or have the content available on a print-out, photo album, or provide a digital copy to download - so the guests can take a self-guided tour.
I keep a number of copies of my garden’s plant lists, by garden room, along with the photo of the plants which are all labeled.
I wanted to do this for a recent Historical Society event when our gardens were featured as part of the tour and I thought it would help our visitors. Following that, I found it a great aid when family and friends visit and want to tour the gardens.
Think of it like this: you’ve worked so hard to make this living work of art something you want to delight in, as well as your houseguests - so don’t be shy. I was honored to provide a garden tour for one of my garden design clients at her annual summer family party. They loved getting acquainted with the beautiful gardens and plants...
People get very excited to see and experience a good garden. It’s your story… Share it.
Gardens Naturally Change
Because gardens are dynamic there will a natural, organic rhythm of change…
Add in the effect of plant companions, pets, extreme weather - and let’s face it, neglect, and you have a situation that more often than we care to admit, needs attention.
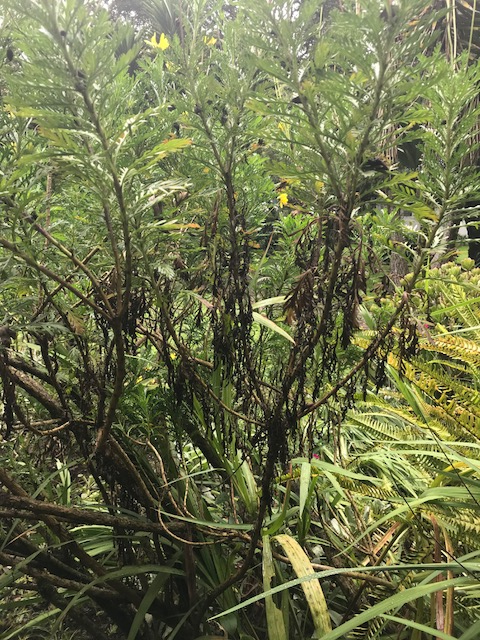
I see far too many suburban homes that are saddled with “Too Big” shrubs that have outgrown their usefulness. They were probably put there by the builder in the first place with no thought other than it’s green and it's a foundation plant.
 |
| Can you see me now? |
Editing Plan
Be honest.
Start with the big pruning first -- rid the space of an overgrown, leggy shrub, or tree.
Then stand back. Look at the space. Take a few photos and react to the image.
Next, I determine what can enhance the opened up space.
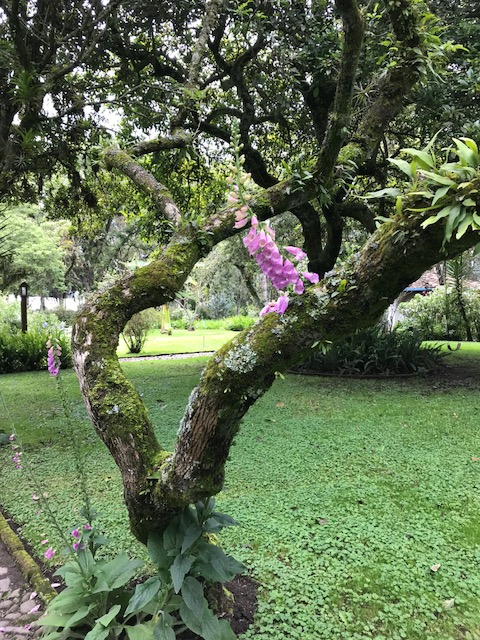
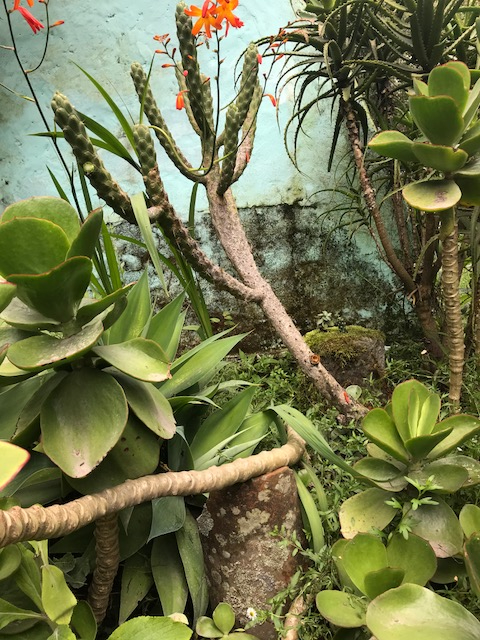
In the example of the Ecuador beds, I cleaned out from under the areas where I cut back the African or Euryops Bush Daisy, the Euryops pectinatus, that had stolen most of the stage.

Then I cut back and pruned the dead plant material that was a result of the bigger thug taking over. I had to prop up the forlorn jade plants that had bowed under all that shrub. I used a beautiful branch that had fallen from a tree, and that is loaded with jewel or lace-looking lichen. Wow.
Once I removed what I thought was the first stage, and cleaned out the space, I was ready to add.
In one bed, for example, I grafted off some of the succulent plant pups, the agavaceae, and planted them in a group of three in front of the beds and around the side borders of another bed. This is a win/win - for the plant and for the look.
I took some of the all-too-plentiful Rose Campion or Lychnis Coronia, and balanced out the front view in the middle bed so that there is a grouping on each side there.
In another, related bed, I surgically pruned out the fern grove; there were too many of the thug crocosmia growing around and in the grove.
This was tedious but it had to be accomplished for a neater, healthier finished look.
I used the extra ferns that I had cut out here as a backdrop in a different bed in a different area. Another win/win.
It was also a fun, interesting moment when an adorable tree frog suddenly popped up as I was pruning. What a treat!
As a kind of a related aside, many often remark how passionate gardeners are about working with plants -- and it did occur to me while I was preening the plants that perhaps a leading reason for that passion is that we gardeners get very, very intimate with our lovers, the plants.
I mean, I’m right in the plants’ blossoms, stems, roots, and every other plant part - cleaning and fussing and prepping like for a beauty or cosmetic treatment.
It’s no wonder we feel so familiar and loving with our plants…
On the other hand, if you’re not feeling the love yet; if you are paralyzed by the thought of tackling a bigger project element - change it up - meaning work on other areas and come back to it. Or ask a friend or family member to help.
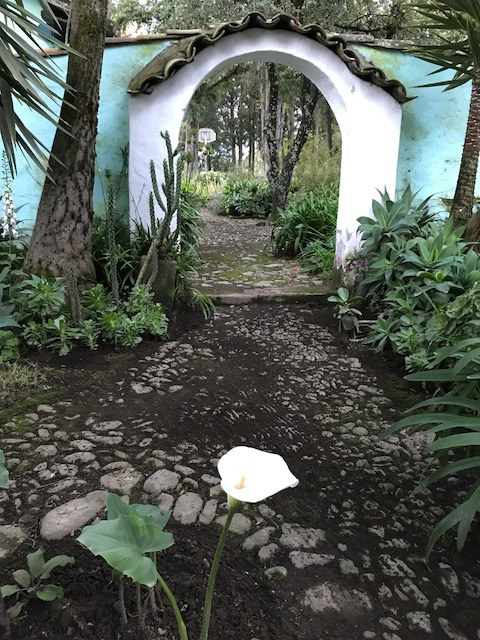
In the Cusin beds, I also knew I wanted to uncover the pretty pots or containers in one of the gardens.
All three looked neglected so a bit of color by way of roses and geraniums added a sweet pop and the pink and fuschia colors complemented the Surprise Lily, Lycoris squamigera and well, the fuschia plant!
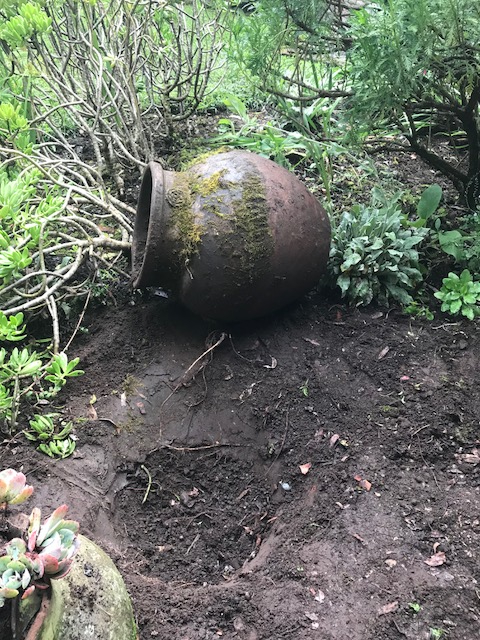
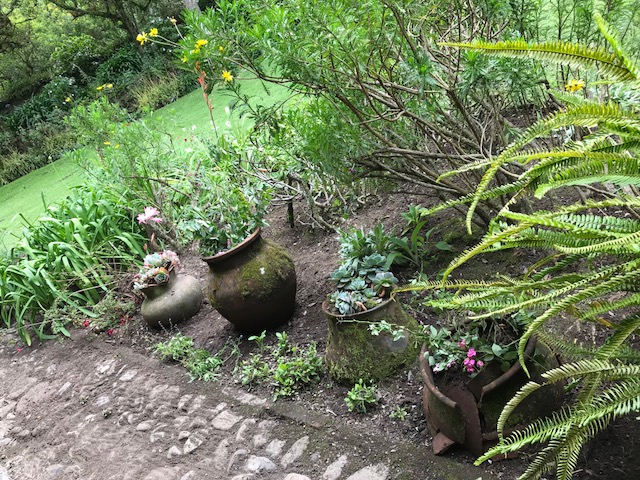
The pots are a bit of hardscape to be used like garden art.
If you are fortunate enough to have a yard with garden beds, don’t think everything needs to be in the ground.
Rather think about scale and dimension. In this way, pots or containers can elevate the eye with drama and color.
My favorite containers and garden art to use is Pennoyer Newman - they offer so many sublime designs and shapes and styles to create an enduring look that works in traditional as well as a more minimalist garden design. And Virginia and team are so very nice to work with.
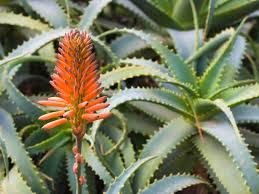
I wanted a bit more height where the ferns were now shaped up, so after I created a curved, shovel cut around the new fern grove, later added an orange aloe here that I took from a later pruning project, to work with this emerging color scheme.
I added a tall orange Bee Balm, Monarda,

which in turn complemented the yellow and orange-colored crocosmia and the gold california poppies that I rearranged and planted on the new shasta daisies fronted by their diminutive cousins near the front of the bed.
Normally you would the tallest or taller plants in the back of the bed and layer down with a mix of evergreens, ornamental grasses, perennials and annuals near the front of the bed for the burst of color
When you have dual access to the bed - meaning paths on both sides - you can anchor the height more or less in the middle or on one side.
View of front - After and of all three refreshed garden beds.
And don’t forget to use edibles as ornamentals. I’ve designed gardens for clients using a color-inspired series of edibles-as-ornamentals beds - made the kitchen garden so much fun! And delicious. The colors practically beckon you to the garden.
Recently, Brie Arthur, the “Plant Lady” who launched her first book, Foodscaping, advises adding edibles to the front of ornamental garden beds. (PS. I had a ball with Brie in Gotham touring the High Line and indulging in champagne following her keynote address at last year’s Hortie Hoopla at NYBG.)

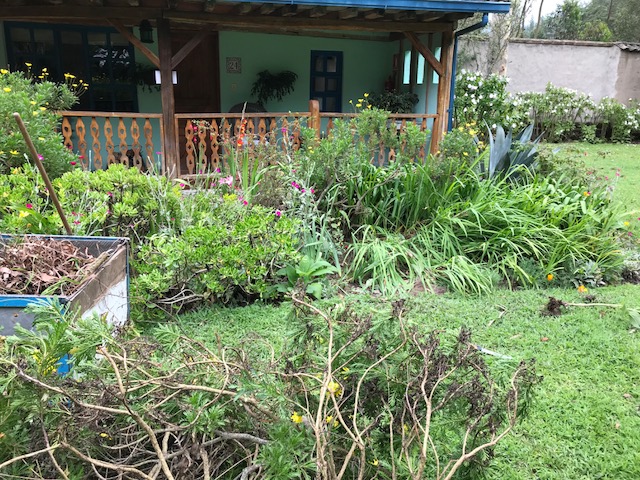
Before and After of a garden using Editing and Design. Discovered new planters that were hidden! Added some pop of color here, too.
After Editing in another part of the garden opposite some of the original rooms at Cusin, I found a lichen-laced roof tile to prop up a succulent and discovered a third stone planter. Can you see it in the back and identify the plants I popped in?
Just like rearranging your furniture and adding some new items, refreshing your garden beds to meet your ever-changing needs or style is an efficient and practical way to decorate your garden rooms.
How glamorous!


Hi, I find reading this article a joy. It is extremely helpful and interesting and very much looking forward to reading more of your work..
ReplyDeletegarden builders fulham